
\n
Last updated: July 31, 2026
\n
 \n
\n
\nImage: ComfyUI Documentation\nPicture this: a photograph of a street at dusk – wet cobblestones catching the amber spill of a shopfront, a cyclist mid-blur at the frame’s edge, every edge crisp yet somehow alive with motion. Now picture generating that image in under a second, with an AI that obeys the exact structure of a reference photo you provide. That is what we are building today.
\n
This guide walks through the Z-Image-Turbo ComfyUI ControlNet workflow – a pipeline that combines Alibaba’s rapid distilled diffusion model with Canny edge detection to give you directed, high-quality image generation that respects the bones of a reference image. Whether you are compositing product shots, exploring generative photography, or just tired of waiting for slow inference, this workflow gives you speed without surrender.
\n
Prerequisites – What You Need Before You Start
\n
 \n
\n
\nImage: ComfyUI Documentation
\n
You will need ComfyUI installed (either locally or via Comfy Cloud) with at least 16GB VRAM on your consumer GPU, or access to an enterprise setup. Three model files power the base pipeline: qwen_3_4b.safetensors (the text encoder), z_image_turbo_bf16.safetensors (the diffusion model itself), and ae.safetensors (the VAE). For the ControlNet branch, add Z-Image-Turbo-Fun-Controlnet-Union.safetensors, which lives in ComfyUI’s models/model_patches/ directory – not the standard ControlNet folder, so double-check that path.
\n
A working knowledge of ComfyUI’s node graph is helpful but not essential. If you have loaded a checkpoint and connected a KSampler before, you are ready. If not, spend twenty minutes with the built-in Workflow Templates first – ComfyUI ships the Z-Image-Turbo workflow there, so you can load the JSON directly without building from scratch.
\n
Step 1: Load the Workflow Template
\n
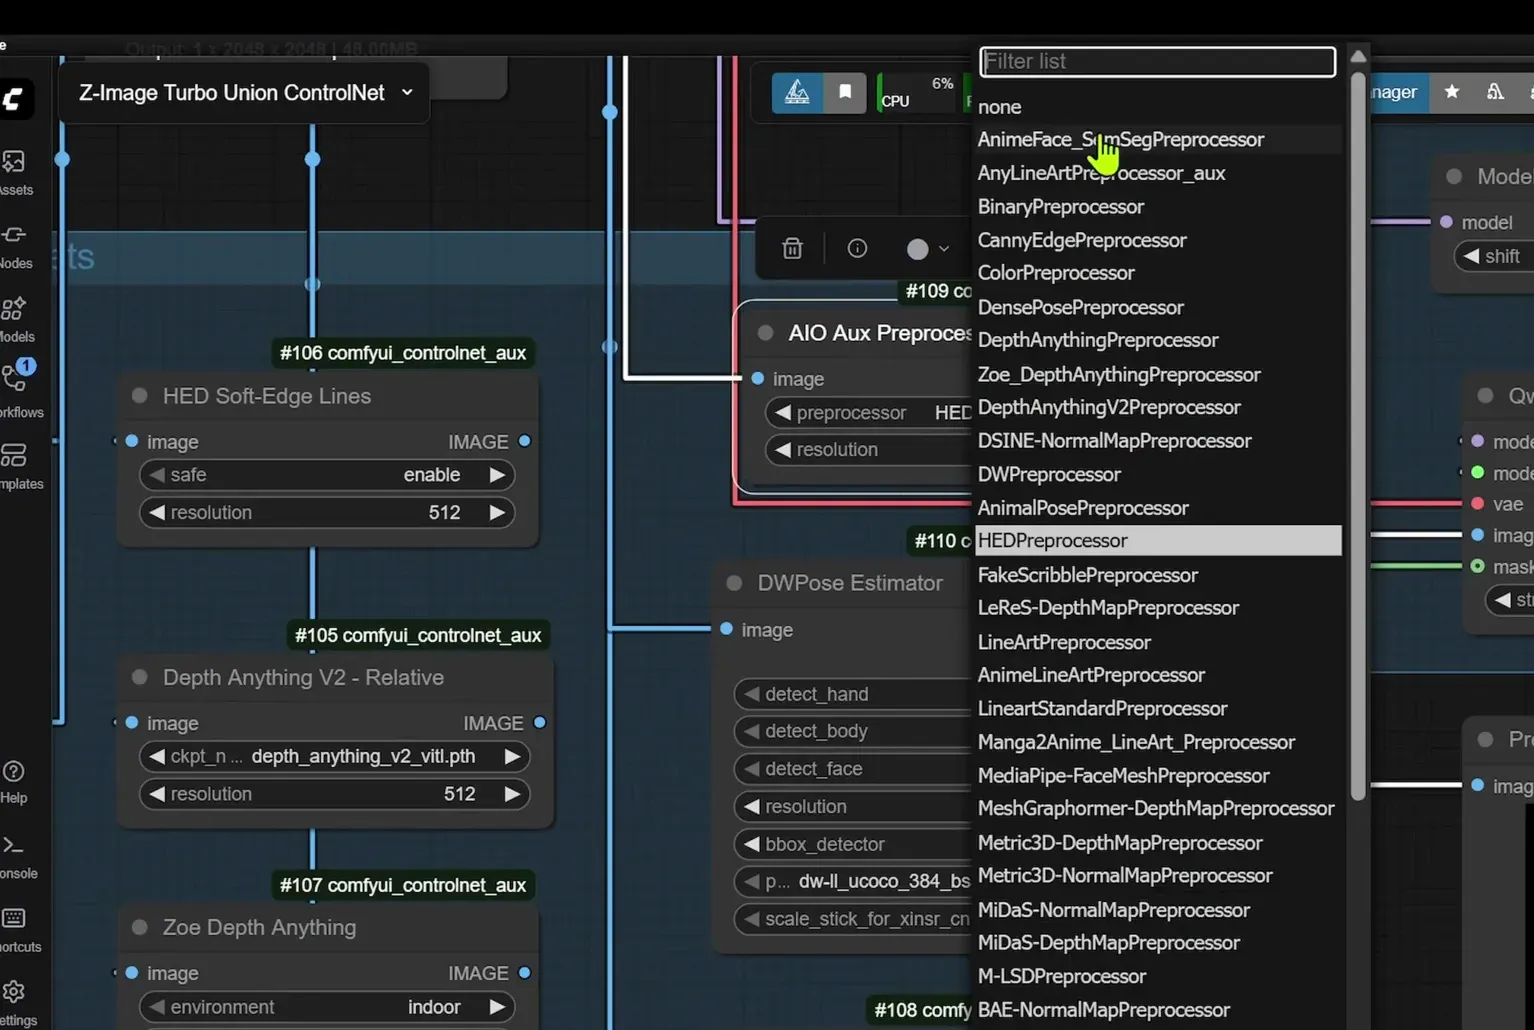
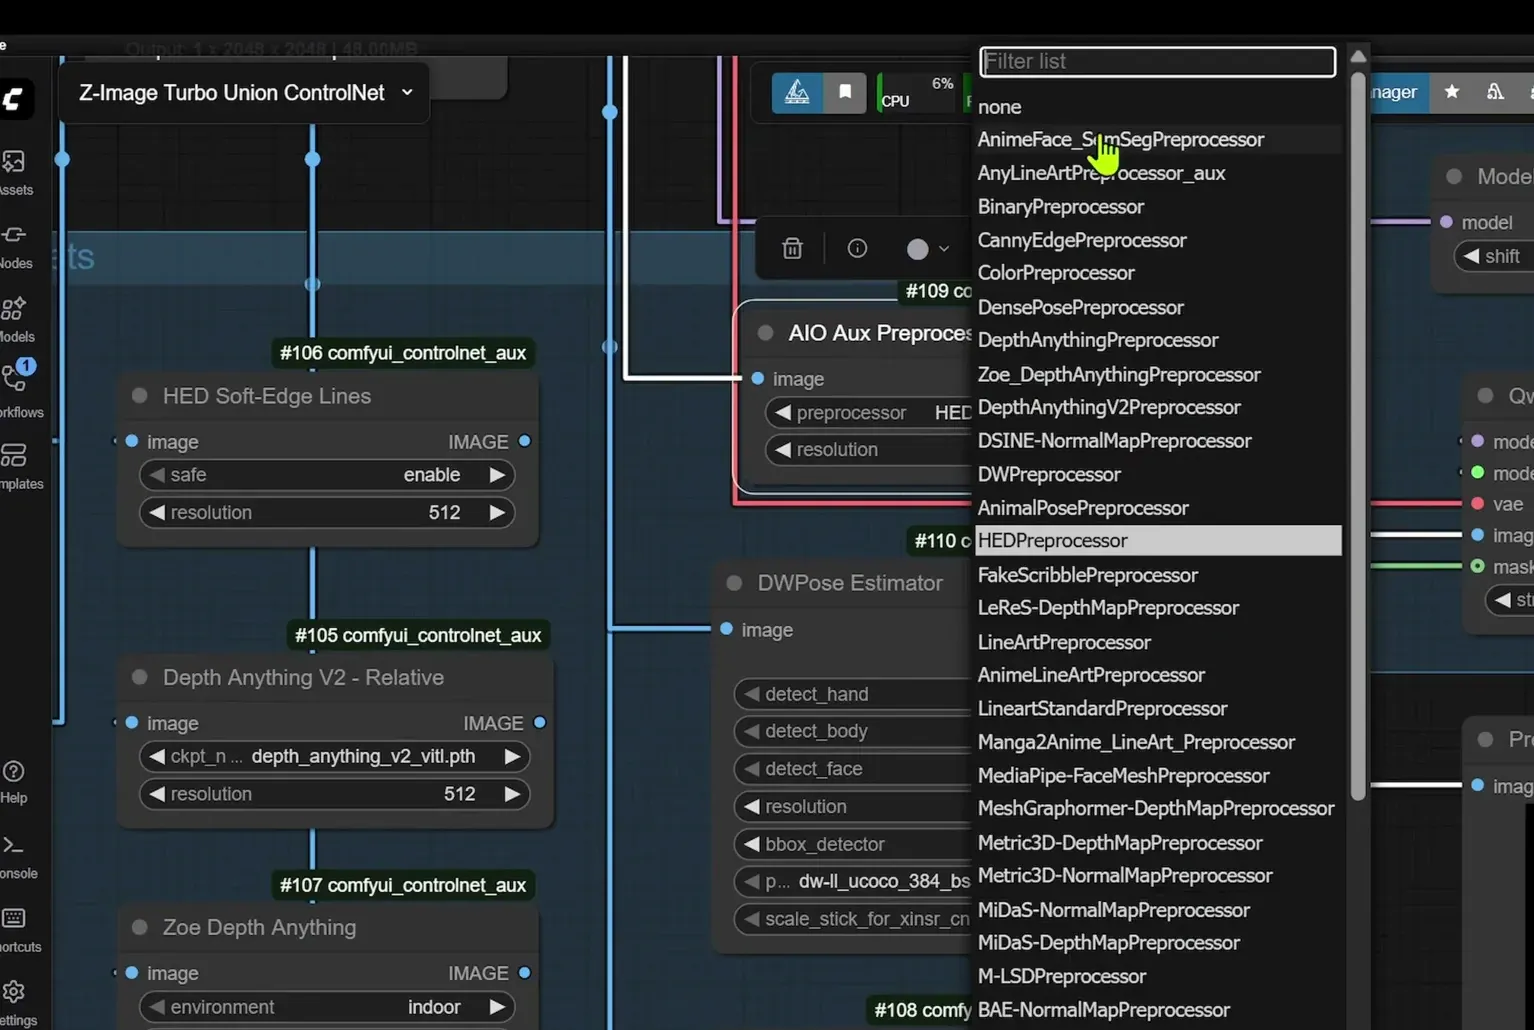
The fastest entry point is ComfyUI’s built-in template library. Open ComfyUI, navigate to Workflow Templates, and search for “Z-Image-Turbo ControlNet”. Load it. You will see a node graph that already wires together the text encoder, diffusion model, VAE, Canny preprocessor, and ControlNet union node.
\n
Alternatively, download the workflow JSON from the official docs at docs.comfy.org and drag it into the ComfyUI window. Both routes deposit you in the same place: a graph ready for your reference image.
\n
Step 2: Choose, Shoot, and Prepare Your Reference Image
\n
This is where the creative direction lives – and it deserves more attention than most tutorials give it. The Canny edge detector will trace the structural silhouette of whatever image you feed it: outlines of objects, horizon lines, architectural geometry, the curve of a shoulder. The quality of that wireframe is a direct function of the quality of your source photograph. Bring it good material, and it rewards you.
\n
What makes a strong reference image. Think in terms of shape language. Images with hard tonal boundaries – a backlit figure against a pale sky, iron railings against a whitewashed wall, the geometric shadow patterns that drew photographers like Moholy-Nagy to the Bauhaus rooftops – give Canny clean, unambiguous lines to trace. That kind of graphic clarity is exactly what the Constructivists were after when they stripped form back to its load-bearing geometry, and it is what we want here. Low-contrast, flat images produce sparse, broken edge maps and give the model too little to anchor against.
\n
Shooting for the workflow. If you are capturing your own reference material, a few practical choices will save you considerable trouble downstream. Shoot at dusk or golden hour: the contrast between warm practical light and cool shadow creates crisp tonal edges without harsh midday harshness. A phone camera in portrait mode will do this well – the computational depth separation it applies actually helps Canny by sharpening object boundaries against the background. If you are using a DSLR or mirrorless camera, close down the aperture slightly (f/5.6 to f/8) to keep more of the frame in focus; a shallow depth-of-field reference image produces a blurry edge map in the background zones, which can muddle the model’s structural reading.
\n
Shoot in RAW if your camera allows it, and shoot in landscape orientation unless the composition is deliberately vertical. Keep the subject in the centre third of the frame for your first attempts – eccentric compositions can confuse the edge map’s structural weighting.
\n
Editing for edge clarity. Before loading your reference image into ComfyUI, spend two minutes sharpening its edges in Lightroom, Snapseed, or Photoshop. In Lightroom, lift Clarity to +40 and Texture to +30; this brings out mid-frequency detail without introducing noise. In Snapseed, the Details panel does equivalent work. In Photoshop, a High Pass filter at 3-5 pixels blended in Overlay mode at 60% opacity is a reliable shortcut. The goal is not a heavily processed image – it is one where the boundary between each element is unambiguous. Preview the result in greyscale before you commit: if you can read the image’s composition clearly in black and white, Canny will too.
\n
Connect your prepared reference image to the Canny preprocessor node. Set the low threshold around 50 and high threshold around 150 as a starting point, and preview the edge map before you commit. You want a clean wireframe, not a noisy scatter. If the result still looks cluttered, apply a slight Gaussian blur to the source before passing it through – two or three pixels of blur removes high-frequency surface noise while preserving the structural lines that matter.
\n
Step 3: Configure the ControlNet Union Node
\n
The Union ControlNet model is the intelligence that reads the wireframe and uses it to constrain generation. Load Z-Image-Turbo-Fun-Controlnet-Union.safetensors into the ControlNet loader node. Set the control type to Canny. The strength parameter is your dial between fidelity to the reference structure and creative freedom – 0.7 to 0.9 gives strong structural adherence, while 0.4 to 0.6 lets the model interpret rather than trace.
\n
One thing worth knowing: the Union ControlNet can handle multiple control signals simultaneously – depth, pose, and Canny in a single pass. For today’s workflow we are using Canny alone, but keep that capability in mind for more complex composites later. Depth maps in particular are increasingly used as a kind of storyboard – they encode foreground-background separation in a way that gives generative models a much clearer spatial reading than a flat reference photograph. For product photography work where layered structural control matters, that combination is worth exploring.
\n
Step 4: Write Your Prompt and Enable the Prompt Enhancer
\n
Z-Image-Turbo includes a Prompt Enhancer module – a reasoning layer that interprets and expands your text input before passing it to the diffusion model. This means you do not need to write exhaustive, comma-laden prompt strings. Write naturally. “A cyclist on a wet city street at dusk, amber light, shallow depth of field” is sufficient.
\n
Think of your prompt less as a specification list and more as a director’s brief: mood, light quality, and implied depth of field. Phrases that invoke lens character – “shallow focus”, “long lens compression”, “wide angle distortion” – translate directly into the model’s spatial decisions. Atmospheric descriptions work well here: “diffuse window light”, “tungsten warmth against cool shadow”, “overcast midday flatness”. The model handles both English and Chinese input with accurate text rendering in either language – a genuine advantage when working with bilingual creative teams or localised campaigns. Enable the Prompt Enhancer toggle in the node if it is not already active; it adds a small inference overhead but meaningfully improves coherence, especially with abstract or atmospheric descriptions.
\n
Step 5: Set the Sampler Parameters
\n
Z-Image-Turbo is a distilled model designed to produce high-quality results at only 8 NFEs – Number of Function Evaluations, which maps roughly to steps in familiar samplers. Set your steps to 8. Do not push it to 20 “just to be safe” – that is one of the most persistent misconceptions about turbo models. More steps degrade output here, because the distillation training was calibrated to the low-step regime. Trust the 8-step setting.
\n
The CFG scale should sit low – typically 1.0 to 3.0. High CFG values that work well for standard SDXL will over-saturate and introduce artefacts here. Check the official workflow JSON for the exact sampler node configuration.
\n
Step 6: Run and Iterate
\n
Queue the prompt. On a consumer GPU with 16GB VRAM you will see output in a few seconds. The result should reflect the structural skeleton of your reference image, interpreted through your prompt’s mood and detail.
\n
Iteration here is fast enough to be genuinely exploratory. Try nudging the ControlNet strength, swapping the reference image for a version with different lighting, or adjusting the Canny thresholds to give the model more or less structural information. This rapid loop – reference, edge map, prompt, output, adjust – is closer to the way a creative director reviews test shots than the slow, anxious waiting of traditional diffusion workflows. For a sense of how this kind of rapid visual iteration shows up in editorial contexts, the Red Pen July 2026 gallery is a useful reference for light, gesture, and compositional instincts worth borrowing.
\n
Troubleshooting – Common Pitfalls
\n
The edge map is too noisy. Lower the Canny high threshold to around 100, or apply a slight Gaussian blur to the reference image before passing it to the preprocessor. A cleaner source image almost always produces a cleaner edge map – go back to the editing pass and lift Clarity and Texture before re-processing.
\n
Output ignores the reference structure. Check that the ControlNet model file is in models/model_patches/ and not models/controlnet/. The Union model expects a specific directory and will silently fail or load incorrectly if placed elsewhere.
\n
Images look oversaturated or artificial. Your CFG scale is almost certainly too high. Drop it to 1.5 and re-run. This comes from SDXL muscle memory and does not apply to distilled models.
\n
Out-of-memory errors. Confirm you are loading z_image_turbo_bf16.safetensors and not a full-precision alternative – the bf16 variant is what keeps it within 16GB VRAM.
\n
The deeper practice from here is not adding more tools – it is sharpening your eye for what makes a reference image structurally honest. The photographers who will get the most from this workflow are the ones who learn to see their subject as a Canny edge map before they press the shutter: bold silhouettes, hard tonal separations, geometry that holds its meaning in pure line. That way of seeing is older than AI. It is what August Sander brought to portraiture, what Cartier-Bresson called the decisive moment, what every life-drawing tutor means when they tell you to draw the space around the figure, not the figure itself. This workflow is one more fast lane to images worth making – but the composition still starts with your eye.
\n
Frequently Asked Questions
\n
Q: What makes Z-Image-Turbo different from standard SDXL or Flux models in a ComfyUI ControlNet workflow?\nA: Z-Image-Turbo uses a distilled S3-DiT architecture requiring only 8 NFEs (steps) for high-quality output, compared to the 20-50 steps typical of non-distilled models. It also includes a built-in Prompt Enhancer reasoning module and accurate bilingual text rendering.
\n
Q: Where does the Z-Image-Turbo ControlNet model file go in ComfyUI?\nA: The file Z-Image-Turbo-Fun-Controlnet-Union.safetensors belongs in models/model_patches/, not the standard models/controlnet/ directory. Using the wrong directory will cause the model to fail silently.
\n
Q: Can I run this workflow without a high-end GPU?\nA: The Z-Image-Turbo bf16 variant fits within 16GB VRAM on consumer devices. Sub-second inference requires enterprise hardware (H800-class), but consumer GPUs will still produce results in a few seconds per image. Comfy Cloud is an alternative if local hardware falls short.
\n
Q: Why should I set steps to 8 rather than a higher number?\nA: Z-Image-Turbo was trained via distillation specifically for the 8-NFE regime. Increasing steps beyond that does not improve quality and can actually degrade output, because the model’s internal assumptions are calibrated to low-step inference.
\n
Q: What CFG scale should I use with Z-Image-Turbo?\nA: Keep CFG between 1.0 and 3.0. High CFG values (7-12) that work well with standard models will over-saturate and introduce artefacts with distilled models like Z-Image-Turbo.
\n
Q: How do I shoot a better reference image for ControlNet?\nA: Shoot at dusk or golden hour for crisp tonal separation, close down to f/5.6-f/8 to keep edges sharp across the frame, and do a quick Clarity and Texture pass in Lightroom or Snapseed before importing. A phone in portrait mode works well – the computational depth separation sharpens object boundaries naturally.
\n
Source: https://docs.comfy.org/tutorials/image/z-image/z-image-turbo
\n
This article was researched and written with AI assistance, then reviewed for accuracy and quality. Talulah at Its.That. uses AI tools to help produce content faster while maintaining editorial standards.
\n