




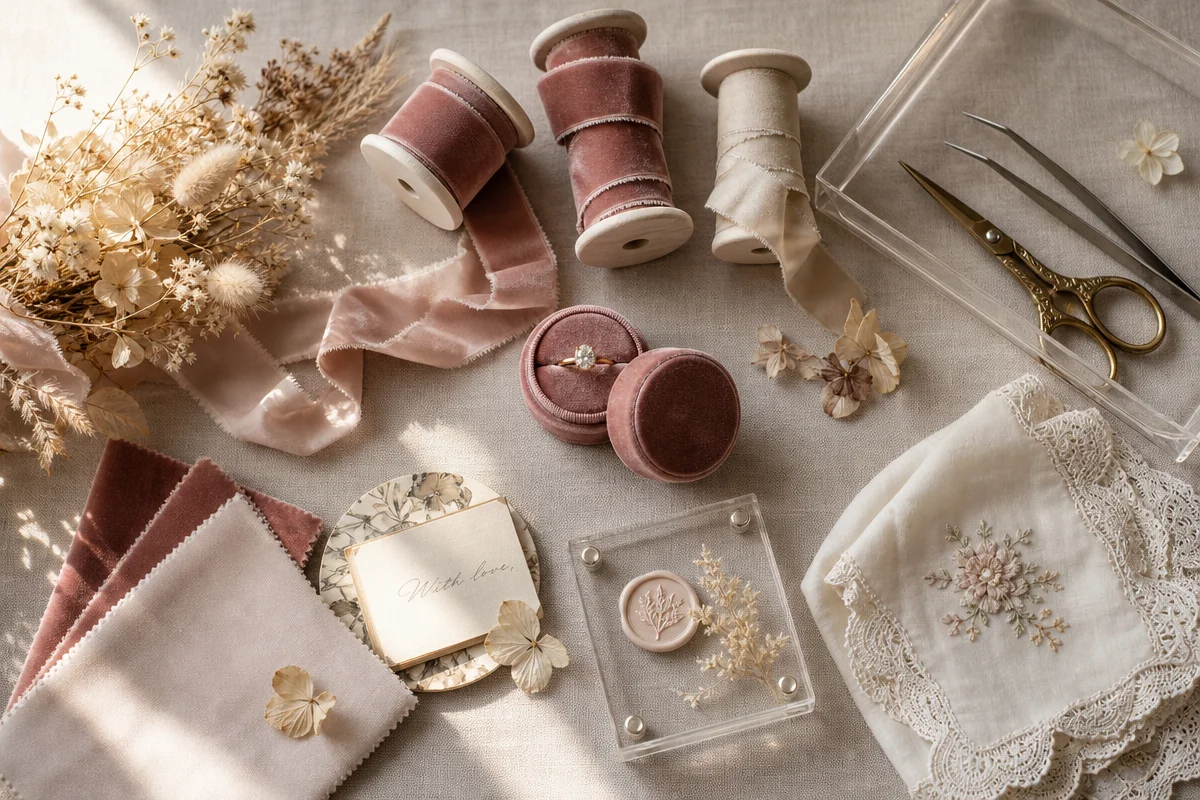
Picture the flat lay mid-build: an invitation suite anchored slightly off-centre, a ribbon trailing away from it like a comma at the end of a sentence, an acrylic block throwing a soft double edge of light across one corner, and a single stem of greenery reaching in from the frame’s edge. That’s not luck. That’s a sequence, repeated on every wedding morning, until it becomes second nature.
What is wedding flat lay styling?
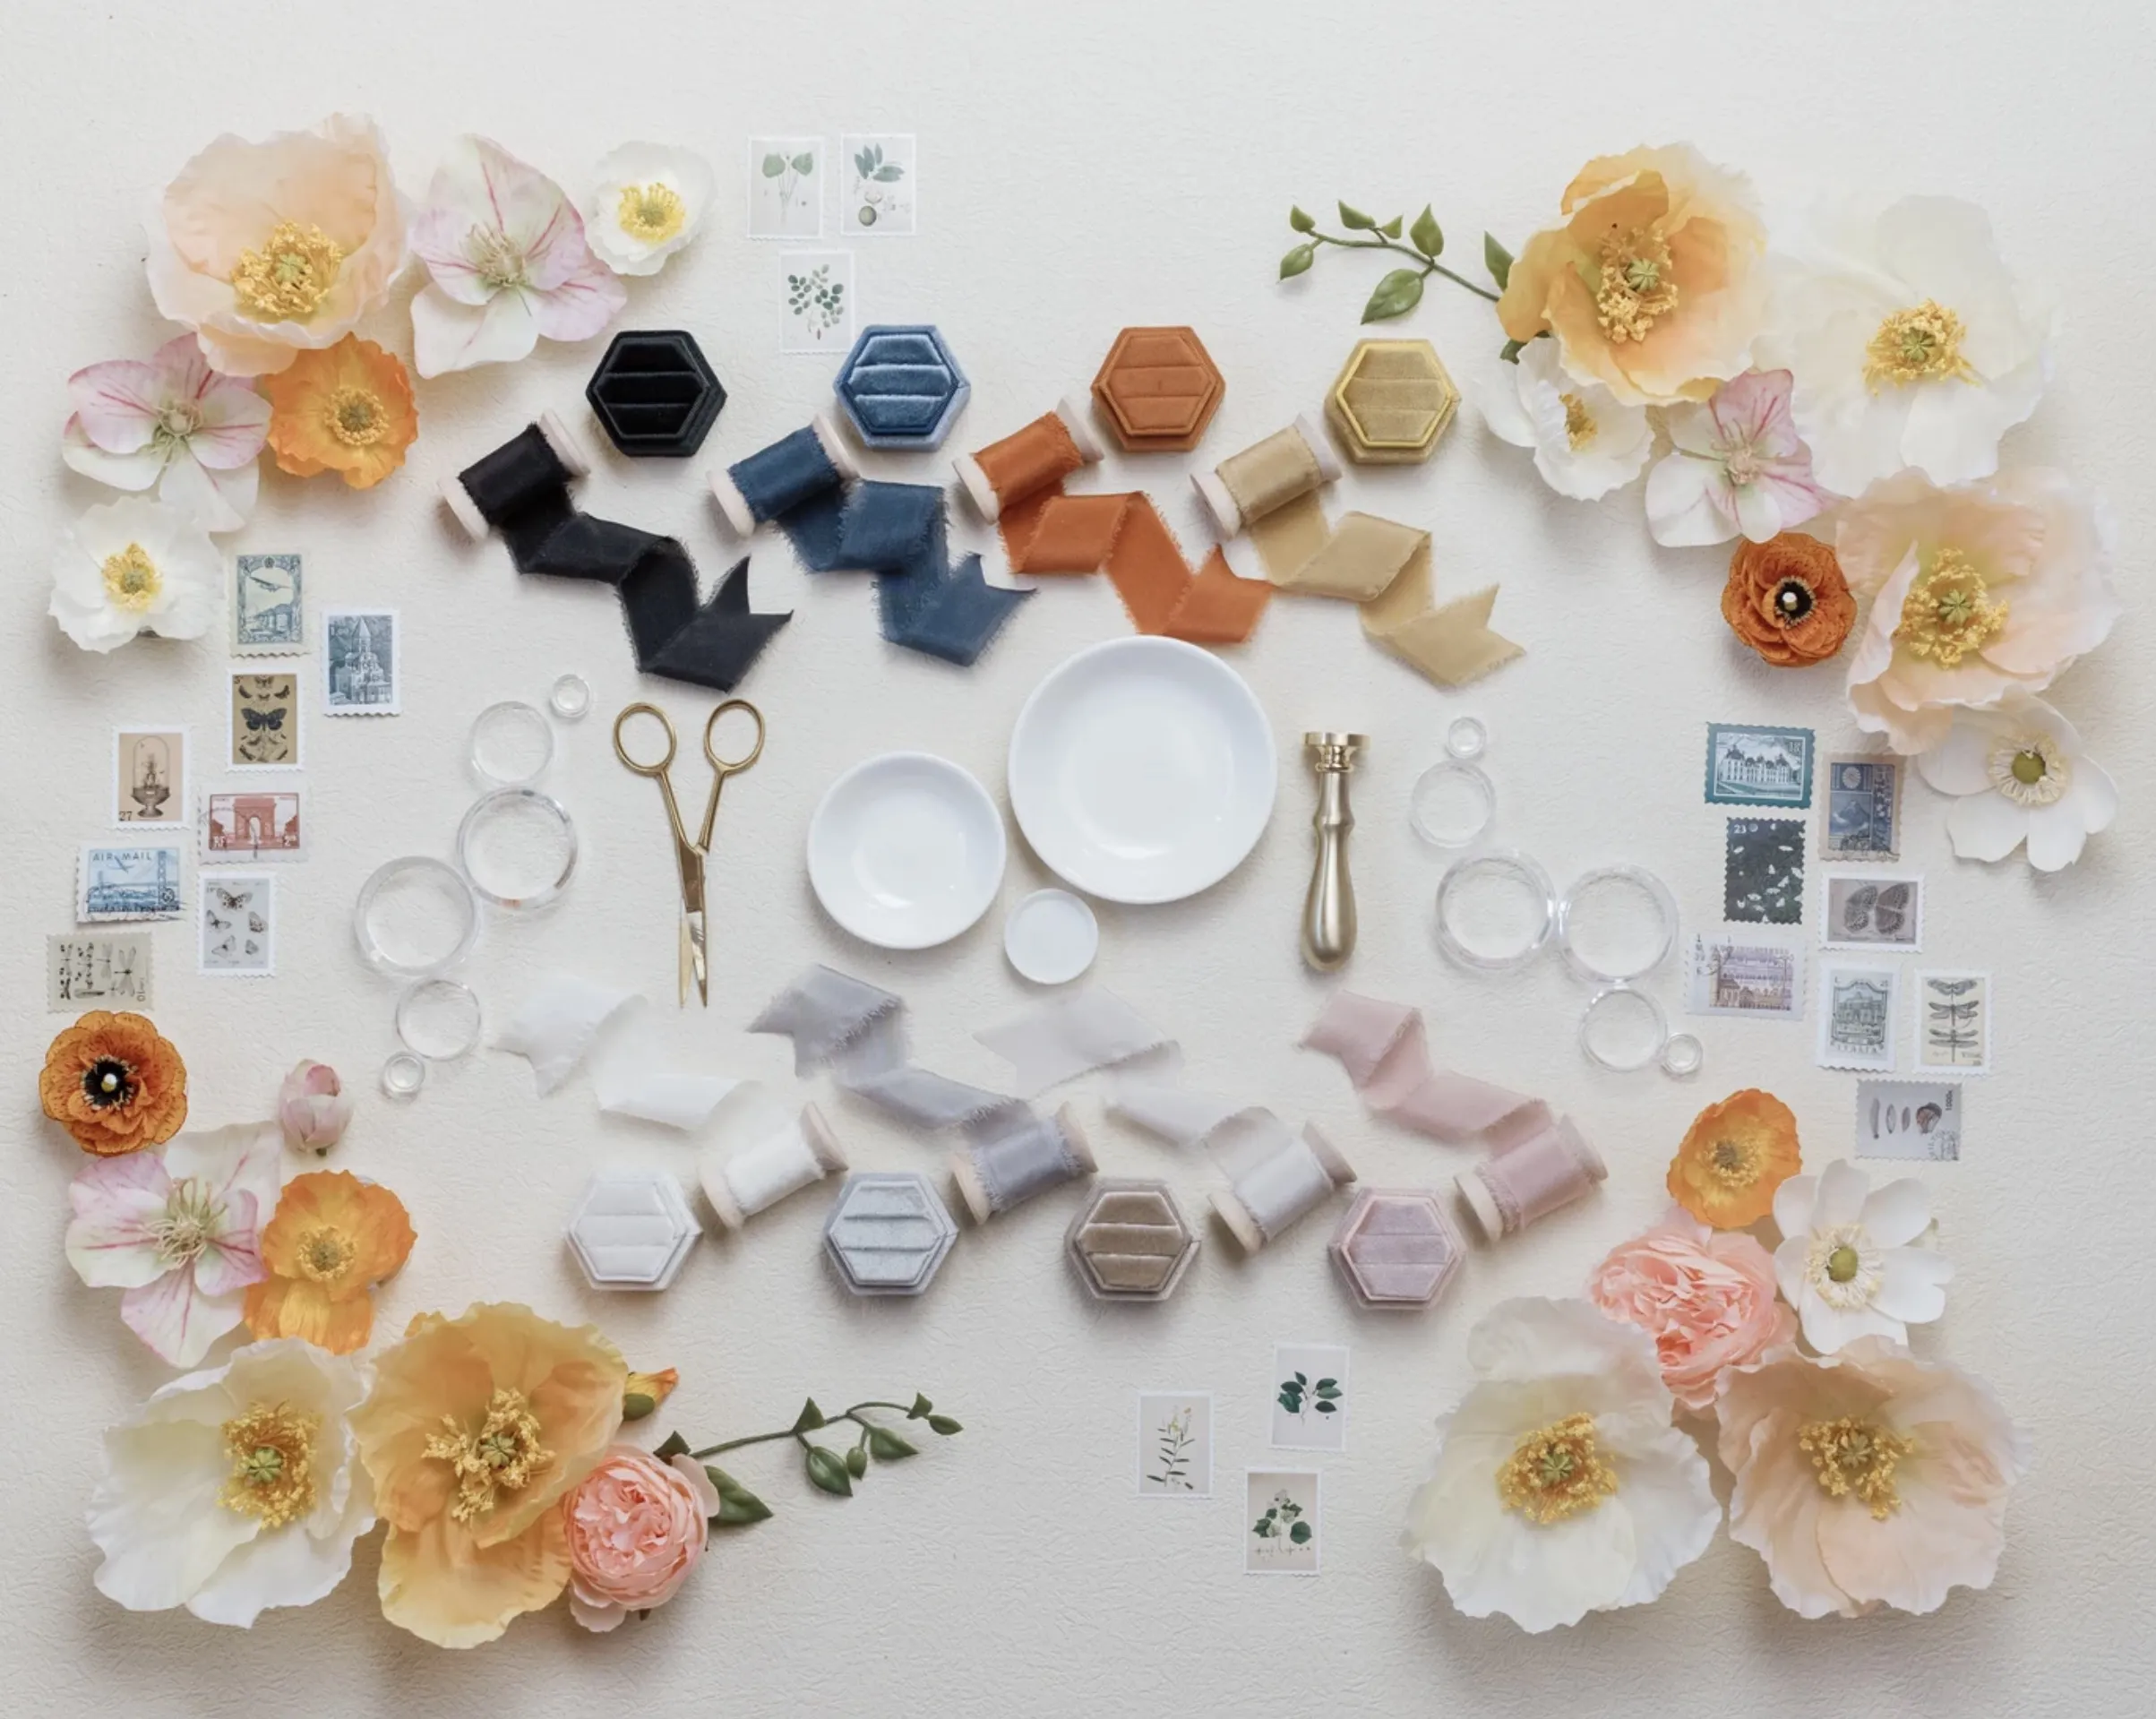
Image: Studio 29 Photography (studio29blog.com)
Wedding flat lay styling is the practice of arranging the day’s small treasures – rings, invitations, florals, jewellery – into a composed overhead shot that tells the story of the wedding before the couple even walks down the aisle. Think of it as still life painting with a shutter instead of a brush. The Dutch masters of the seventeenth century built entire careers on arranging fruit, flowers, and glassware to suggest abundance and fleeting beauty; a modern flat lay does the same work, just faster and with a ring box standing in for the goblet.
The foundational kit is smaller than most beginners assume. We start with a soft, textured styling mat that gives us a clean, non-slip surface – this single item does more to elevate a shot than any prop on top of it. Ribbon comes next, for tying invitation suites or draping loosely across the frame to lead the eye. Then jewellery dishes and trays to cradle rings without them rolling off camera, and a scatter of small props – candles, wax stamps, keys, confetti – that add texture without clutter.
What should be in a wedding flat lay styling kit?
A well-stocked kit covers texture, height, and light without needing last-minute shopping trips. Beyond the mat, ribbon, and dishes already mentioned, acrylic blocks are the quiet workhorses. They elevate a hero piece like the main invitation so it sits proud of the paper goods beneath it, they stack to create layered depth, and – held at the right angle to a window – they bend incoming light into soft, elongated streaks across the frame. That’s a genuine, useful trick, though it’s worth being precise about what it is: a refraction effect from clear acrylic catching light at an angle, not a double exposure, which is a camera or editing technique achieved by combining two images in-camera or in post. Conflating the two leads to disappointment on set when a block doesn’t magically layer one scene over another. A set of five blocks in varying sizes covers most situations.
Sourcing is easier than it sounds. Craft stores stock the basics – ribbon, dishes, stamps – while Etsy and antique stores are where the interesting stuff lives: a vintage key with a tassel, a mismatched wax seal, a spool of frayed silk ribbon nobody else will have. Treat any specific “must-buy” product list, including our own, as one photographer’s taste rather than gospel – the point is building a personal kit you understand, not replicating someone else’s shopping cart.
One thing no kit can supply: flowers. Fresh greenery and blooms are the single most important prop in a flat lay, and they can’t be packed months in advance. We always ask the couple to request extra stems from their florist specifically for detail shots – loose petals, a spare bloom or two, some trailing greenery – delivered the morning of.
A start-to-finish flat lay, step by step
Here’s how we actually build one on a wedding morning, from bare mat to finished frame.
Choose the palette first. Pull two or three colours straight from the wedding – the invitation suite, the ribbon, a flower variety – and let everything else answer to them. This is Colour Theory 101, but it’s the single biggest lever in the whole process: a flat lay with five colours competing for attention reads as clutter, while one with a disciplined palette reads as considered, even if the arrangement is loose.
Anchor with the invitation. Place the invitation suite first, slightly off-centre rather than dead-square in the frame – roughly along a third, in the spirit of the rule of thirds. Everything else builds around it as the fixed point the eye returns to.
Build asymmetrically, not symmetrically. Resist the urge to mirror props left and right. Cluster the ring box and jewellery to one side, let ribbon trail diagonally, and leave open “breathing” space on the other side of the frame. Asymmetry reads as candid and editorial; perfect symmetry reads as stock photography. Vary height too – a stacked acrylic block or a raised dish keeps the whole thing from sitting flat on one plane.
Position the light before you shoot. Set up beside a window in open, indirect light – never direct sun, which blows out highlights and casts hard shadows. If the light feels too harsh or contrasty, hang a sheer curtain or a diffusion panel between the window and the flat lay to soften it. If one side of the arrangement goes muddy and shadowed, use a simple white reflector (a foam board or even a sheet of paper) opposite the window to bounce light back in. And if the light feels flat and shadowless, block some of it on the reflector side with a dark cloth or card – this is negative fill, and it’s what puts gentle definition back into the shadows of a ring box or a fold of ribbon.
Shoot with the right settings, phone or camera. On a camera, shoot from directly overhead on a tripod arm, aperture around f/5.6-f/8 for enough depth of field to keep the whole surface sharp, ISO as low as the light allows, and white balance set manually rather than on auto, which tends to drift warm or cool depending on the window. On a phone, the same principles apply: lock focus and exposure with a tap-and-hold, use the grid overlay to keep the invitation aligned to a third, and avoid digital zoom entirely – step back and crop later instead, since zoom degrades detail exactly where a flat lay needs it most.
Edit with restraint. In Lightroom, Snapseed, or whatever’s to hand, nudge exposure and white balance to match what the scene actually felt like, lift shadows slightly if the negative fill left them too deep, and resist heavy saturation boosts – the goal is a faithful record of the palette you chose, not a filtered reinterpretation of it.
What do most photographers get wrong with flat lays?
The most common mistake is treating props as decoration rather than a system. Colour discipline is the rule that separates a polished flat lay from a chaotic one – pick a palette tied to the couple’s scheme and let every prop, ribbon, and dish answer to it. A single stray colour pulls the eye away from the story.
Don’t lock into your first composition, either. Move pieces around. Vary the height, mix rough textures against smooth ones, swap round dishes for angular ones. The difference between a good flat lay and a great one is often the eighth arrangement, not the first.
So the paradox resolves itself: a beautiful flat lay looks spontaneous, but it’s built from repetition and a well-rehearsed kit. The couple’s story doesn’t arrange itself – we just give it the props, the light, and the patience to find its shape.
Frequently Asked Questions
Q: What are the essential items in a wedding flat lay styling kit?
A: A soft textured styling mat, ribbon, jewellery dishes and trays, and small props like candles, wax stamps, keys, and confetti form the core kit, with acrylic blocks added for height and light effects.
Q: Do acrylic blocks create a double exposure effect?
A: No – they refract and bend natural light into soft streaks and add height and stacked depth, but a double exposure is a separate camera or editing technique that combines two images, not something a block produces on its own.
Q: What camera settings work best for a wedding flat lay?
A: Shoot from directly overhead with an aperture around f/5.6-f/8 for even sharpness, a low ISO, and manual white balance to avoid the colour drift auto settings often introduce near a window.
Q: Can you shoot a good flat lay on a phone?
A: Yes – lock focus and exposure with a tap-and-hold, use the grid overlay to align the composition to a third, and avoid digital zoom, cropping afterwards instead to preserve detail.
Q: Why can’t flowers be packed into a styling kit in advance?
A: Fresh blooms and greenery wilt quickly, so they must be sourced the morning of the wedding – photographers typically ask the couple to request extra stems from their florist specifically for detail shots.
Q: What’s the best light for shooting a wedding flat lay?
A: Natural, indirect light beside a window, softened with diffusion if it’s harsh and balanced with a reflector or negative fill as needed, brings out texture and true colour far better than indoor artificial lighting.
Source: https://www.studio29blog.com/2023/08/wedding-flat-lay-styling-kit
This article was researched and written with AI assistance, then reviewed for accuracy and quality. Talulah at Its.That. uses AI tools to help produce content faster while maintaining editorial standards.