


\n
Last updated: July 14, 2026
\n
 \n
\n
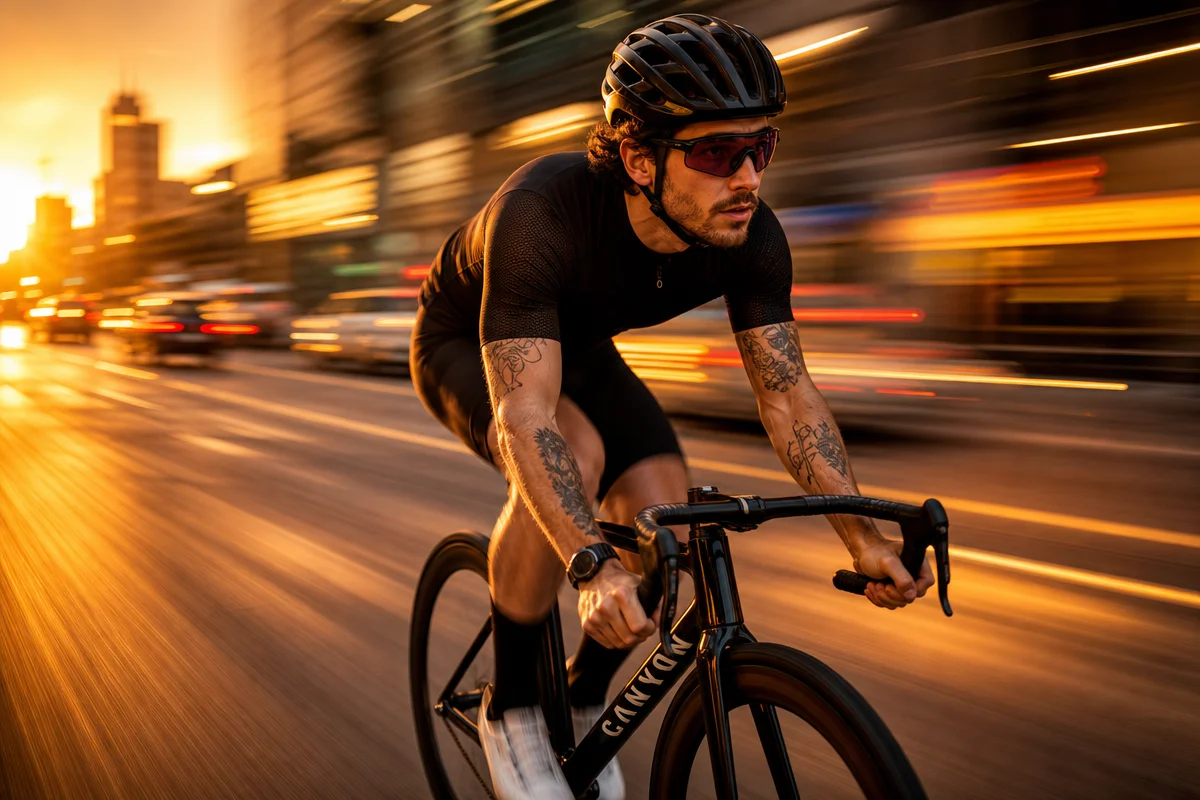
\nImage: Photo Image Planet\nPicture a motorbike carving through a city corner, its rider’s helmet razor-sharp while the background dissolves into ribbons of colour – streaks of amber streetlight, smeared shopfronts, the ghost of a crowd. The bike looks faster than any frozen frame could suggest. That image didn’t happen by accident. It was made, deliberately, by a photographer who chose blur over precision and motion over stillness.
\n
That is the photograph we are going to teach you to create – from choosing where to stand, to the moment you import the frames and decide which one is the one.
\n
Why Motion Blur Photography Techniques Change Everything
\n
\n
\nImage: Photo Image Planet
\n
Most of us learn photography by trying to freeze things. We chase fast shutter speeds. We want every eyelash sharp, every water droplet suspended mid-air. But motion blur photography techniques work from the opposite philosophy – they ask what movement feels like, not what it looks like stopped dead.
\n
The principle goes back further than digital cameras. The Futurists of the early twentieth century – Giacomo Balla, Umberto Boccioni – obsessed over capturing velocity on canvas. Their painted figures had six legs, twelve arms, trails of energy behind them. That idea is practically useful to us: when we look at a Futurist painting, we understand that the blur is telling us something about force and direction, not just speed. When we compose a panning shot, we are making the same editorial choice – we are deciding which direction the energy flows, and what surrounds it. Photographers like Jacques Henri Lartigue discovered that a camera dragged sideways while the shutter was open could recreate that same electric sensation. The technique has never gone out of fashion because it speaks to something true: speed has texture, and stillness cannot always show it.
\n
Unintentional blur – caused by camera shake or a subject moving unexpectedly – looks like a mistake. Intentional blur looks like intent. The difference lies entirely in our control, and that control starts well before we raise the camera.
\n
Step One: Choose Your Location With the Background in Mind
\n
This is where most beginners skip ahead too quickly. Before we touch a single setting, we need to find a background that will work with the blur.
\n
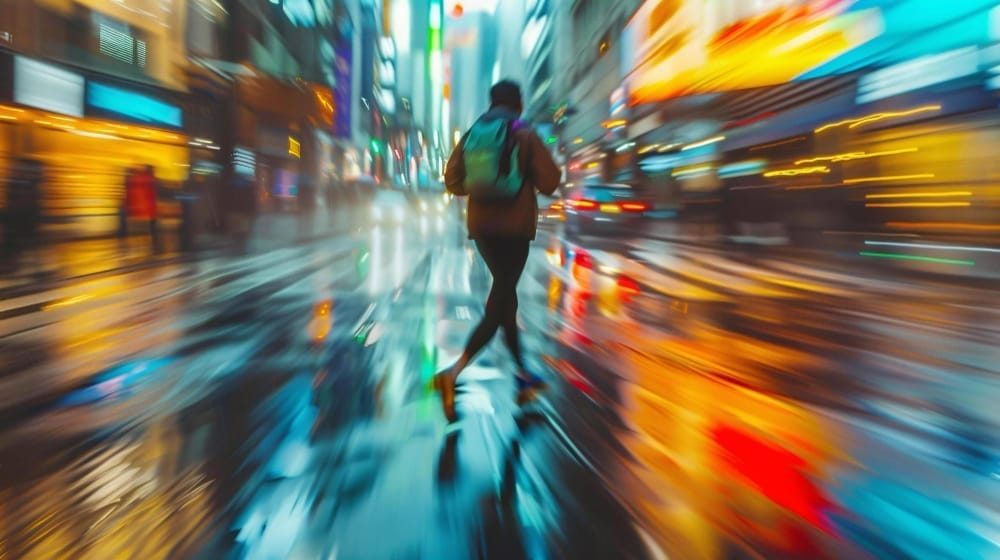
The background in a panning shot is not incidental – it is half the image. When it smears into horizontal streaks, we want those streaks to be interesting: a contrast of warm and cool tones, a repeating architectural pattern, a wash of city light against shadow. A plain concrete wall will produce a dull smear. A row of illuminated shop windows, a line of parked cars in different colours, a tree-lined avenue – these produce streaks with rhythm and chromatic variety.
\n
We also want to consider the direction of light. Shooting with the light source broadly behind us means the subject will be well-lit. Shooting into the light gives us rim-lighting and silhouette, which can look extraordinary when the subject is partially sharp against a luminous, streaked background. Both are valid; neither is accidental.
\n
Position ourselves slightly ahead of the point where the subject will pass. This gives us time to begin tracking before the shutter fires, which is essential for a smooth pan. A road junction or bend in a cycling path is ideal – predictable trajectory, consistent speed.
\n
How to Set Shutter Speed for Motion Blur
\n
Shutter speed is the engine of this technique. Slower speeds mean longer exposures, which means more time for moving objects to trace their path across our sensor. The creative sweet spot sits between roughly 1/10th and 1/125th of a second – a range most beginners skip past on their way to 1/500th or faster.
\n
At 1/125th, a cyclist becomes slightly soft against a sharp background. At 1/30th, they begin to streak. At 1/10th, we are painting with light rather than capturing it. Each step down the dial is a creative decision, not a technical failure.
\n
Set the camera to shutter priority mode – marked S on Nikon, Sony, and Fujifilm bodies, or Tv on Canon. This lets us lock in the shutter speed while the camera handles aperture automatically, which is helpful when light is changing quickly. Start at 1/60th, shoot a few frames, then slow down in increments until the blur looks intentional rather than accidental.
\n
The challenge in bright daylight is overexposure – a slow shutter lets in a great deal of light. This is where neutral density (ND) filters become essential. Think of them as sunglasses for our lens: they reduce incoming light without affecting colour or focus, allowing us to hold a slow shutter even in harsh midday sun. A 3-stop ND is a sensible starting point for overcast days; a 6-stop handles bright sunshine. Polarising filters offer similar light-reduction with the added bonus of cutting glare from wet roads or glass.
\n
For phone photographers: open the native camera app and look for a Pro or Manual mode. On Samsung, it’s under ‘More’; on iPhone with iOS 18, Photographic Styles give limited control, but third-party apps like Halide or Camera+ 2 expose full shutter speed adjustment. Mount the phone on a small flexible tripod or a grip with a cold shoe – at exposures below 1/30th, hand-holding introduces random shake that will undermine the pan.
\n
For kit lenses: the standard 18-55mm that ships with most entry-level DSLRs and mirrorless cameras is genuinely capable here. Shoot at the longer end (around 50-55mm) – the compressed perspective emphasises the background blur beautifully.
\n
Autofocus: Continuous Tracking Before the Shot
\n
This step is often overlooked in written guides. Set the autofocus mode to continuous tracking – AF-C on most cameras, AI Servo on Canon bodies. This allows the camera to keep adjusting focus as the subject moves across the frame. If we lock focus before the subject reaches us and then fire, we will miss.
\n
Use a single central focus point rather than a wide zone. A wide AF zone can grab the background instead of the subject, especially at slow shutter speeds. On Fujifilm bodies, the subject-tracking AF mode works well; on Sony, Eye AF can be engaged even for motorsport if the rider’s visor is visible. On entry-level cameras without sophisticated tracking, prefocus on a mark on the road where we expect the subject to be and switch to manual focus just before firing – an old technique, still effective.
\n
Panning: Keeping the Subject Sharp While the World Blurs
\n
Panning is the technique that separates motion blur photography from simple camera shake. We track our moving subject with the camera – rotating from the hips, not the wrists – while firing the shutter. When done correctly, the subject stays relatively sharp because we are moving at the same angular velocity, while the background smears into horizontal streaks behind them.
\n
Camera stability is everything here. Keep elbows tucked in. Follow through after the shutter fires, the way a golfer completes their swing. Any sudden vertical or lateral jerk during the exposure will ruin the shot. The movement must be smooth, consistent, and committed.
\n
Three things determine whether a panning shot succeeds: the right shutter speed, smooth tracking, and patience. Most photographers describe a similar experience – dozens of failed attempts, then one frame where subject and blur align perfectly, and suddenly the technique clicks. That first sharp panning shot is genuinely revelatory.
\n
Practice on predictable subjects first. A car passing at a consistent speed on a straight road is far more forgiving than a footballer changing direction mid-run. Once we have the mechanics in muscle memory, we can apply the same principles to cycling, athletics, wildlife, or street photography.
\n
Reviewing Your Failures (This Is Where the Learning Lives)
\n
After a burst of panning attempts, resist the urge to delete everything that didn’t work. Import all the frames and look at the failures carefully. A shot where the subject is sharp but the background barely moved tells us we need a slower shutter speed. A shot where both subject and background are equally blurred tells us we are not tracking smoothly enough – we are panning in short jerks rather than one fluid arc. A shot where the subject is sharp but positioned at the very edge of the frame tells us we are releasing the shutter too late in the pan.
\n
Each failure has a diagnosis. Run through them systematically, adjust one variable at a time, and go back to the same spot.
\n
Editing: Refining, Not Fabricating
\n
In Lightroom, a well-executed panning shot needs modest work: a slight boost to clarity on the subject, a touch of dehaze to punch through any atmospheric haze, and careful use of the masking tools to apply sharpening selectively to the subject rather than the whole frame. The blur in the background should remain natural and unsharpened.
\n
On a phone, Snapseed’s Selective tool allows us to target the subject specifically for sharpening and micro-contrast, while leaving the streaked background untouched. The ‘Details’ brush in Snapseed gives surprisingly precise control for a mobile edit.
\n
In post-production, tools like Lightroom and Photoshop allow us to enhance or even simulate directional blur, but nothing replaces the quality of genuine in-camera motion. When we edit a real panning shot, we are refining something; when we fake it, we are constructing something – and the eye usually knows the difference. If you are serious about the craft, pairing strong technique with thoughtful photo editing will elevate the final result considerably.
\n
What We Can Do With This Skill
\n
The applications extend well beyond motorsport and sport photography. Fashion photographers use slow panning to convey the sweep of fabric in motion. Street photographers drag the shutter through busy intersections to make a lone figure feel both isolated and surrounded. Product photographers – particularly those working on e-commerce photography tools – use controlled blur to suggest dynamism in otherwise static imagery.
\n
Come back to that motorbike on the corner. We understand now why the helmet is sharp and the background is not. We can see the location choice behind it – the warm amber streaks of streetlight chosen deliberately against cooler shadow. We can read the shutter speed, the tracked movement, the smooth follow-through, the moment the photographer chose to fire. The image has not changed – but we have. We are reading it differently, which means we are ready to make one.
\n
\n
Frequently Asked Questions
\n
Q: What shutter speed should I use for motion blur photography?\nA: The creative range for intentional motion blur sits between roughly 1/10th and 1/125th of a second. Start at 1/60th and adjust based on how fast your subject is moving and how much blur you want to achieve.
\n
Q: What is the panning technique in photography?\nA: Panning involves tracking a moving subject with your camera while using a slow shutter speed. When executed smoothly, the subject remains relatively sharp while the background blurs into horizontal streaks, conveying a strong sense of speed and motion.
\n
Q: How do I avoid overexposure when using slow shutter speeds in bright light?\nA: Use a neutral density (ND) filter or a polarising filter. These reduce the amount of light entering the lens without affecting colour or sharpness, allowing you to maintain slow shutter speeds even in bright daylight conditions.
\n
Q: Can I do motion blur photography with a smartphone?\nA: Yes. Many modern smartphones include a pro or manual mode where shutter speed can be adjusted. Apps like Halide or Camera+ 2 expose full manual control on iPhone. Results improve significantly with a small tripod or stabiliser to control camera movement, especially at exposures slower than 1/30th of a second.
\n
Q: How is intentional motion blur different from accidental blur?\nA: Intentional motion blur is controlled and directional – produced deliberately through shutter speed choice and panning technique. Accidental blur from camera shake tends to look random and multidirectional, which reads as a technical error rather than a creative decision.
\n
Q: How does background colour affect the look of a panning shot?\nA: Significantly. A background with warm and cool tones in close proximity – streetlights against shadow, coloured shopfronts, autumn foliage beside grey tarmac – will produce streaks with chromatic variety and visual interest. A uniform background produces flat, undifferentiated smear. Choosing your location with the background palette in mind is as important as any camera setting.
\n
Source: https://www.insta360.com/blog/tip/blur-action-photography.html
\n
This article was researched and written with AI assistance, then reviewed for accuracy and quality. Talulah at Its.That. uses AI tools to help produce content faster while maintaining editorial standards.
\n