


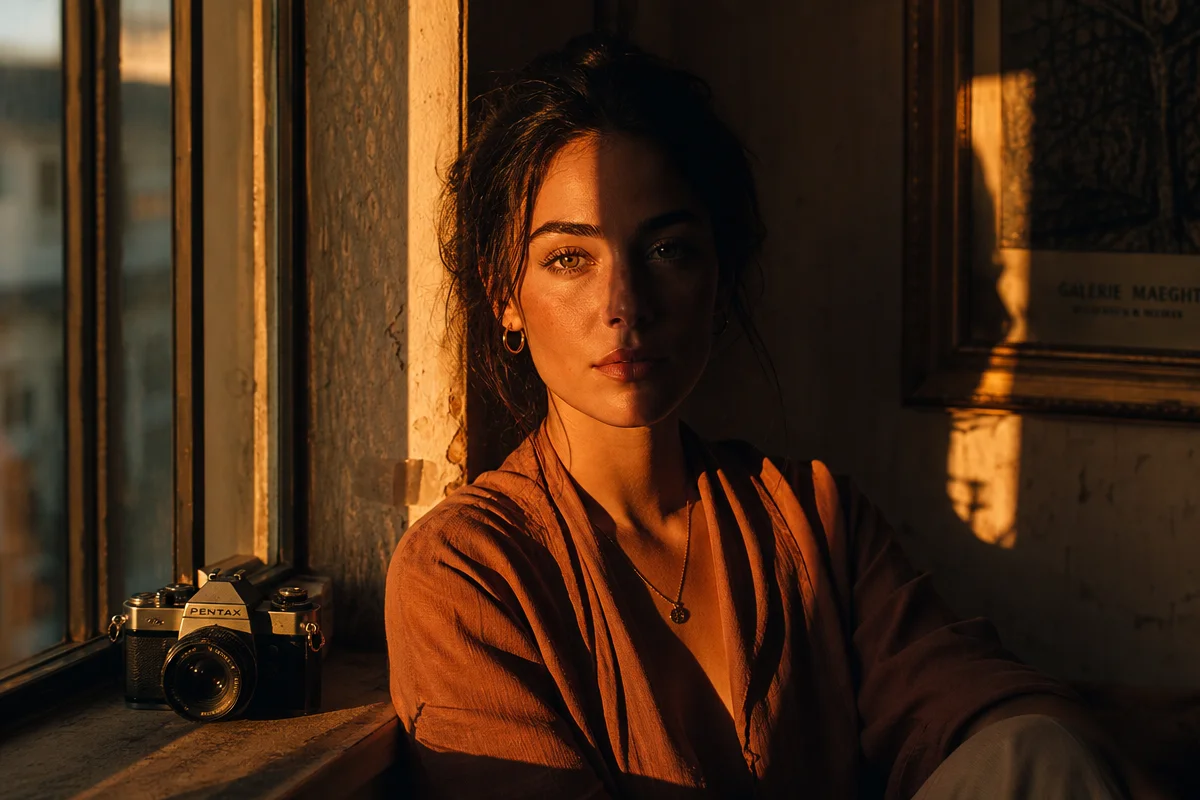
Picture this: a face turned fifteen degrees toward a single lamp, and half of it disappears – not into blackness exactly, into suggestion. The cheekbone catches light, the jaw dissolves into shadow, and a straightforward portrait suddenly reads like a confession withheld. That’s split lighting photography doing its quiet work: one light, one 90-degree angle, and a face divided cleanly down the middle.
The question worth asking is why this particular arrangement of light and shadow feels so loaded. A softbox angled slightly off-centre gives us gentle, flattering illumination – pleasant, forgettable. Split lighting refuses pleasant. It insists on a decision: which half of this person do we trust?
What is split lighting in photography?
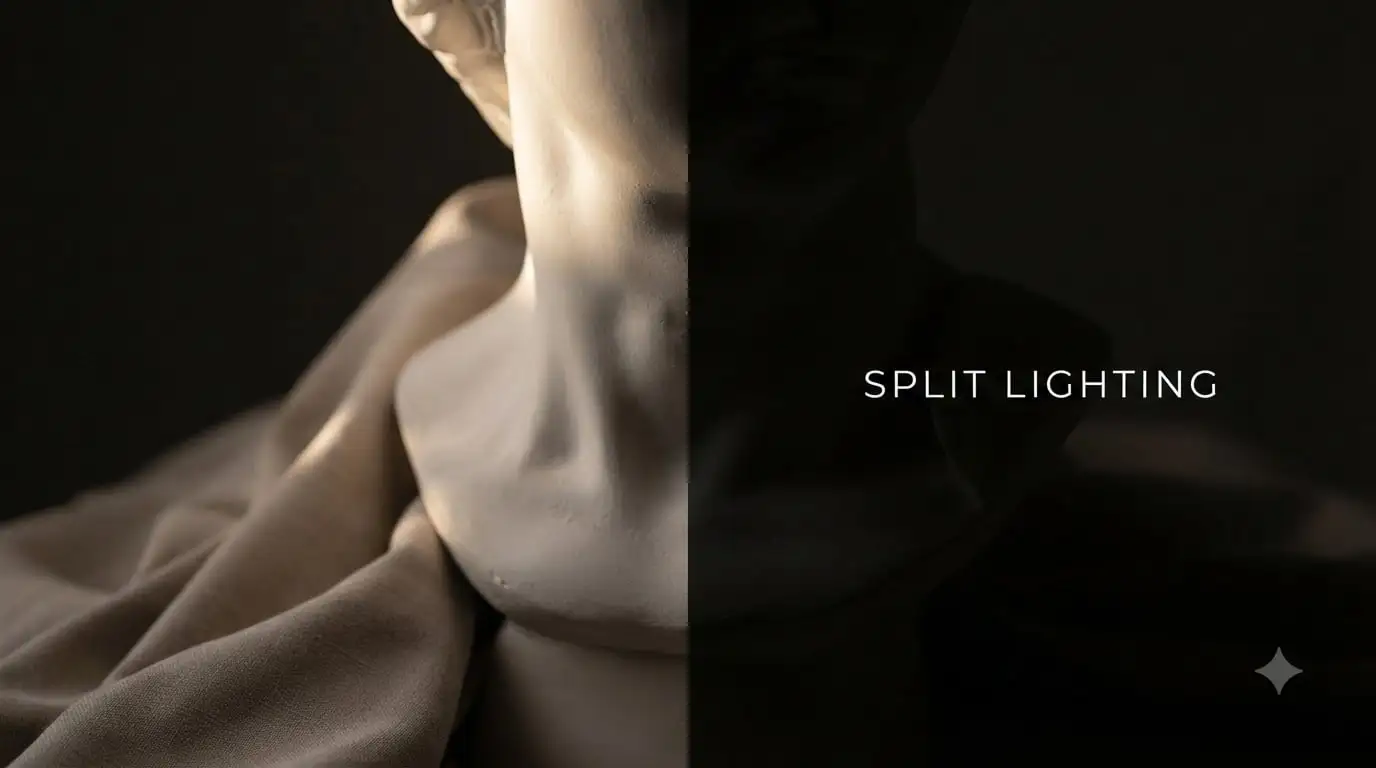
Image: Revell Photography / Miles Everett
Split lighting is a portrait technique where the key light sits at roughly a 90-degree angle to the subject, illuminating one half of the face while the other falls into shadow. The result is a hard-edged line running down the centre of the nose – light on one side, dark on the other, with minimal blending between them.
The classic starting position has the subject facing the camera with the head level, but this is a baseline, not a rule. Turning the chin slightly towards the light widens the lit plane and brings more of the shadow-side eye into view; turning away from the light narrows it further and deepens the drama. We treat the head angle as a dial, not a switch – small adjustments change how much information the shadow side gives away, and that’s the whole game. The light itself sits roughly at face height, positioned at 3 or 9 o’clock if the subject occupies 12, though dropping or raising it a few inches changes how the shadow falls across the eye socket and is worth testing rather than fixing in place.
A beginner’s workflow for setting it up
Here’s how we’d build this from nothing, whether the light in the room is a flash, a lamp, or a window.
Position and distance. Start the subject about two to three metres from the light, with the light itself roughly a metre or so from them – close enough to be directional, far enough that the light wraps slightly rather than slapping the skin. Camera sits directly opposite the subject, roughly level with their eyes.
Modifier choice. A bare bulb or an undiffused window gives us a harder, more graphic split – useful when the brief wants edge and grit. A shoot-through umbrella, a softbox, or a sheet of diffusion over that same window softens the transition line without sacrificing the shadow side’s depth. We tend to start soft and harden the light later, since it’s easier to remove diffusion than to manufacture texture that isn’t there.
Exposure starting point. On a camera, we’d begin around ISO 100-200, f/4 to f/5.6, and a shutter speed appropriate to the light source (1/125s for flash sync, whatever ambient reading suits a window). Metre for the lit cheekbone and aim for middle grey there; let the shadow side fall two to four stops below. That’s a starting point, not gospel – drag the shadow side up with a reflector or a second, much dimmer fill light if we want the eye to stay legible, or let it go darker for mood.
Protecting the shadow-side eye. This is the detail that separates a moody portrait from a portrait that’s simply lost half its face. A small silver or white reflector angled into the shadow side, even a sheet of A4 paper held just out of frame, bounces enough light back to keep a catchlight in that eye and a hint of iris detail. Without it, the shadow eye reads as a black hole, and the whole emotional effect – withheld, not absent – collapses into just absent.
On a phone. None of this needs a studio. Position someone near a single window on an overcast day, turn off any secondary light sources in the room, and use portrait mode or simply lock focus and exposure with a tap on the lit cheek. A phone’s screen, propped at an angle, or a second phone’s torch, makes a passable fill for the shadow eye in a pinch. The geometry is identical – one light source, one 90-degree turn – the tool is just whatever’s in our pocket.
Editing. In Lightroom or Snapseed, we’d nudge the shadows slider up marginally if the eye needs rescuing, add a touch of clarity to the lit side to hold texture, and resist the urge to lift the whole shadow region evenly – that flattens the split back into a gradient, which is the one thing we’re trying to avoid.
Why does split lighting create such emotional intensity?
Split lighting works emotionally because the eye reads shadow and light as psychological information, not just exposure values. The lit side of the face feels open, present, available. The shadow side reads as withheld – hidden, guarded, a little dangerous. That contrast is why the technique dominates film noir cinematography, music promo stills, and editorial fashion work where the brief calls for mood over warmth.
This isn’t a new discovery. Painters were exploiting the same psychology centuries before anyone held a camera – Caravaggio built entire compositions around chiaroscuro, the violent collision of light and dark, to give ordinary figures the weight of martyrs. Rembrandt softened that harshness into something more intimate but kept the same principle: shadow as character, not absence. Split lighting is chiaroscuro’s direct descendant, just with a strobe – or a phone screen – instead of a north-facing studio window.
The equipment matters less than the geometry. A bare, unmodified flash produces very hard shadows that grab at skin texture and grit – useful for a rock musician’s promo shot, less so for anyone hoping to look rested. Soften that same light through an umbrella, a softbox, or a diffusion sheet, and the transition along the centre line gentles without losing the shadow side’s readability. A north-facing window on an overcast day does the job just as well as a studio strobe; the technique cares about angle, not price tag. For readers building out a broader lighting vocabulary, our guide to Portrait Photography Using Natural Light covers how to read window light the same way.
Choosing split lighting for the story you’re telling
We’d think of split lighting less as a rule about face shape and more as a creative lever. Pushed hard, it can visually narrow a round or wide face – one entire side falling into shadow reads as less width than any amount of contouring product could manage. Used on a narrower face, the same shadow can hollow out a cheek in a way that feels sculptural on one subject and gaunt on another; it’s less about the face and more about how much fill we let back in and how the subject angles their chin. We wouldn’t reach for it in a corporate headshot aiming for approachable warmth – that’s simply the wrong emotional register – but for actors, musicians, and editorial work built around moral ambiguity or intensity, it’s exactly the right tool. Match the light to the intent – the same discipline that shapes composition in our product photography guide applies here: know what the image needs to say before we build the setup.
So: what does one light and a turned chin actually buy us? Not drama for its own sake, but control – the ability to decide, with a single lamp and a few degrees of angle, exactly how much of someone we’re willing to show.
Frequently Asked Questions
Q: What is split lighting in photography?
A: Split lighting is a technique where the key light sits at roughly 90 degrees to the subject, illuminating one half of the face while the other falls into shadow, creating a hard-edged line down the centre of the face.
Q: How do we set up split lighting on a budget or with a phone?
A: Position someone near a single window with the light hitting one side of their face, use a reflector or a second phone screen to keep a catchlight in the shadow-side eye, and lock exposure on the lit cheek – the geometry works identically whether the light source is a studio strobe or daylight.
Q: How do we protect the shadow-side eye from going completely black?
A: Bounce light back in with a small reflector, a sheet of white paper, or a dim secondary light – enough to hold a catchlight and a trace of iris detail without flattening the split.
Q: Does face shape determine whether split lighting works?
A: It’s more of a creative choice than a rule – the technique can narrow a wider face or hollow a narrower one, so it’s worth testing on the specific subject rather than ruling it out by shape alone.
Source: https://revellphotography.com/split-lighting/
This article was researched and written with AI assistance, then reviewed for accuracy and quality. Talulah at Its.That. uses AI tools to help produce content faster while maintaining editorial standards.