Last updated: May 26, 2026

Image: Art Institute of Chicago
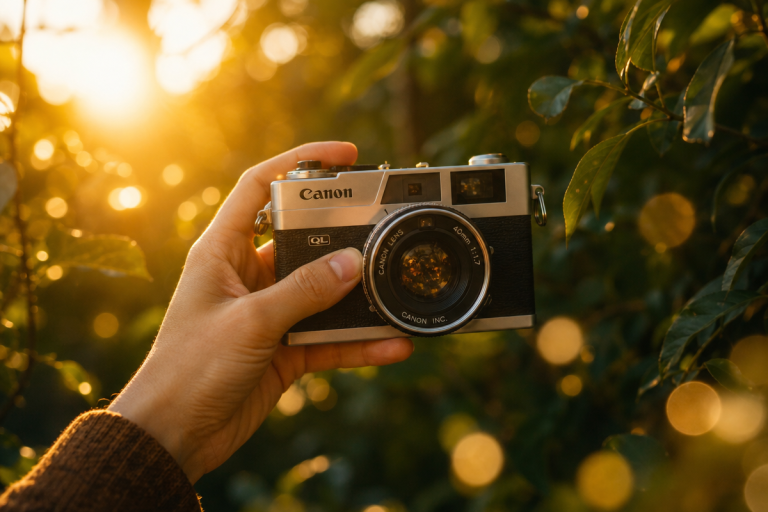
Picture this: a late-afternoon street, the asphalt glowing amber like cooling copper, shadows stretching long and lean across the pavement, every dust mote in the air turned to gold. A cyclist rides into frame. The light catches the spoke of their wheel. We press the shutter. That image – effortless, luminous, alive – is not luck. It is physics, preparation, and the willingness to set an alarm for an ungodly hour.
The truth that photographers rarely admit is this: mastering natural light is not about the camera we carry. It is about understanding the sun as a collaborator rather than a given condition.
What golden hour actually is – and why it changes everything
Image: Art Institute of Chicago
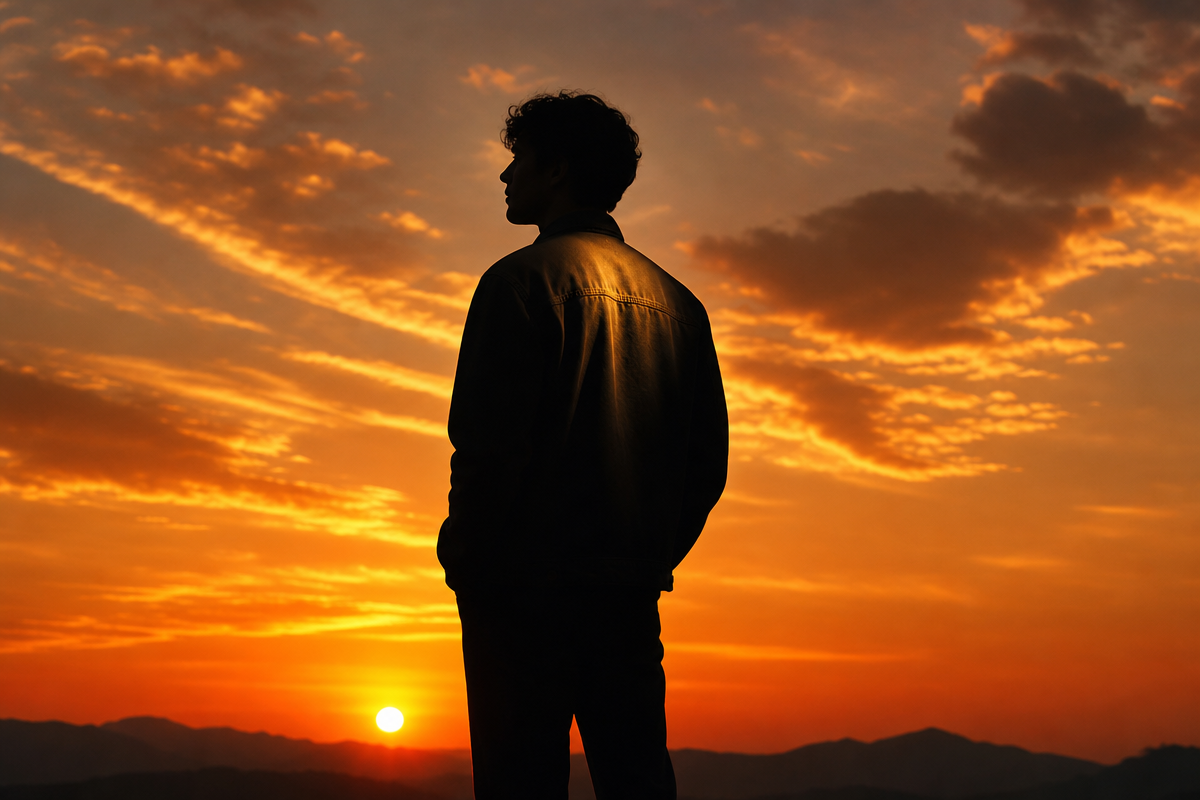
Golden hour is the period shortly after sunrise and shortly before sunset when sunlight travels through a greater thickness of atmosphere. The short wavelengths – blues and violets – scatter away. What remains is warm, directional, diffused: amber, rose, ochre. The light wraps around subjects rather than flattening them. Skin looks warm. Texture becomes visible. Shadows grow long and purposeful.
This is not a metaphor. It is Rayleigh scattering – the same physics that makes sunsets dramatic. The difference between golden hour and midday light is the difference between a Rembrandt portrait and a passport photo. During golden hour, the sun acts as a large, low, warm light source placed at the edge of our frame. That is a setup most studio photographers would spend hours trying to replicate artificially.
Understanding light direction and quality for better photos is foundational here. Front-lit subjects during golden hour glow evenly – every feature washed in warm amber, the effect intimate and flattering. Side-lit subjects gain texture and drama – every fold of fabric, every leaf vein becomes sculptural, the kind of dimensionality that flat midday light destroys entirely. Back-lit subjects silhouette against luminous skies or bloom with rim light, their edges traced in fire. Each angle tells a different story, and across a single golden hour session, all three are available to us if we move through the scene thoughtfully.
How we scout: arriving before the light does
We arrive thirty minutes before golden hour begins. Not at the moment it starts – thirty minutes before. That window is when we read the scene without pressure: where the shadows are already falling, which surfaces will catch the low sun, where pedestrians naturally move, which walls or doorways will act as natural reflectors.
Our scouting checklist on location:
- Identify the sun’s direction and mark where it will set or rise relative to our position
- Find surfaces that face the sun directly – these become natural fill reflectors (pale walls, light-coloured pavement, water)
- Locate natural frames – doorways, archways, gaps in foliage – that will glow when back-lit
- Note where shadow lines will fall across the ground; these become our leading lines and compositional anchors
- Check background clutter; golden hour light is beautiful, but a distracting background remains distracting
- Test two or three positions before committing; we move laterally to change the relationship between subject, light, and background
Free tools like PhotoPills or The Photographer’s Ephemeris calculate exact sun position – azimuth and elevation – for any location and date. We use them the evening before to plan, not the morning of when we are standing in the field guessing.
Mastering natural light: positioning, settings, and shadows
Golden hour rewards the prepared. The sun’s azimuth – its compass direction – and elevation change continuously throughout the session. A location that offers perfect side-light at 6:47pm will be back-lighting us by 7:12pm. This is not a problem; it is an opportunity.
Those shadows matter enormously. During golden hour, shadows stretch three to five times longer than the objects casting them. A row of trees becomes a rhythmic pattern of parallel lines across a field. A person standing on a street corner casts a shadow that turns into a leading line pulling the viewer’s eye through the frame. Street photographers working in the tradition of Saul Leiter understood this instinctively – shadow and light as equal compositional elements, not background and foreground.
Camera settings: shoot in RAW format to retain maximum latitude for editing. Set white balance manually to around 5,500-6,000K to preserve the warmth without exaggerating it into artificiality. A wide aperture (f/1.8 to f/2.8) separates subjects from backgrounds cleanly. Expose for the highlights – the sky, the brightest surface in frame – and recover shadows in post. This protects against blown-out skies, which golden hour produces in abundance if we expose carelessly.
For phone photographers, HDR processing handles much of the exposure challenge automatically; portrait mode delivers subject separation, while pro or manual mode – available on most flagship devices – gives access to histogram controls for precise exposure. The real advantage of a phone here is inconspicuousness: a quality worth more than most people acknowledge when shooting candid street scenes.
Three genres, three approaches
Portraits: We position the subject so the sun falls at roughly 45 degrees to their face – the classic Rembrandt angle. This gives us a lit side that glows warmly and a shadow side that adds shape and depth. If we want that luminous, slightly otherworldly rim-lit look, we place the subject directly between us and the sun, expose for their face, and let the hair and shoulders catch fire with backlight. The mood is romantic, the colour palette rose-gold and deep amber – it works because the warm hue and soft contrast feel emotionally safe, like a memory rather than a document.
Street photography: Here we work at f/8 to f/11 rather than wide open. We are not isolating a single subject; we are capturing a scene with depth – the cyclist, the shadow, the street, the shop front behind. We pre-focus to around two to three metres and let subjects move through our frame rather than chasing them. The goal is graphic impact: strong diagonals from shadows, silhouettes against luminous walls, pools of amber light interrupting stretches of shade. We look for the frame within the frame – a lit doorway, a gap between buildings – and wait for a subject to walk through it.
Landscape: We shoot from low, exaggerating the perspective of long shadows and making foreground texture – grass, gravel, sand – read clearly against the warm sky. Midday flat light produces flat images; golden hour gives us the raking light that reveals the land’s texture and shape. We use a tripod, close our aperture to f/8 or f/11 for maximum depth of field, and bracket our exposures across the golden-to-blue transition so we have material for time blending in post.
The nuances most photographers miss
Blue hour is not golden hour’s lesser sibling. It is its own distinct phenomenon, and most photographers pack up before it arrives. Blue hour occurs in the minutes immediately before sunrise and after sunset, when the sun sits below the horizon but indirect light still illuminates the sky. The colour temperature drops toward 8,000-10,000K. The sky turns a deep, even cobalt. Street lamps and windows begin to glow. For architectural and cityscape photography, blue hour offers something golden hour cannot: a balanced exposure between artificial light and natural light, where both the sky and the illuminated city hold detail simultaneously.
The advanced technique worth learning is time blending – the practice of combining photographs taken across the full golden-to-blue-hour transition into a single composite image. We shoot the warm landscape during golden hour, capture the sky during blue hour, and merge them in post using luminosity masks. The result is a photograph that could not exist in a single exposure: warmth and cool drama occupying the same frame.
Editing: phone and desktop workflows
The edit is where we protect and extend what the light gave us on location.
On a phone (Lightroom Mobile or Snapseed): Begin with exposure – bring the highlights slider left to recover any blown sky, then lift the shadows to open up the darker areas of the frame. Increase the whites slightly to restore perceived brightness. Warm the white balance another 200-300K if the amber quality feels diluted. Clarity adds texture and micro-contrast to subjects; keep it subtle on portraits, stronger on landscapes and street scenes. Saturation is a trap – instead, increase vibrance, which boosts muted tones without over-saturating skin. Finish with a gentle vignette to draw the eye inward.
On desktop (Lightroom Classic or Photoshop): The workflow mirrors the above, but with greater precision. Use the HSL panel to target specific hue channels – pulling the orange luminance up warms skin and sunlit surfaces without affecting the whole image. Selective adjustments via the masking tool let us lift shadow detail on a subject’s face while keeping the background appropriately moody. For time blending, the Adobe Photoshop colour balance workflow makes tonal matching across layers precise and controllable, letting us align the warm dusk foreground with the cool blue-hour sky without compromising either exposure. Apply luminosity masks to blend the two exposures naturally along the horizon line.
Three things separate photographers who use golden hour well from those who merely shoot during it: they arrive early enough to observe the light before committing to a position; they move through the scene rather than planting in one spot; and they stay through blue hour rather than leaving at sunset.
There is a reason International Day of Light – observed annually on 16th May – centres on the cultural and artistic role of illumination alongside the science. Photography as a medium is, at its root, the writing of light. Every deliberate choice about when, where, and how we position ourselves relative to the sun is as meaningful a compositional decision as framing or subject selection.
The answer to the opening question – why does golden hour photography feel so different from images taken at other times of day – is not mystical. It is geometry, atmosphere, and the angle of incidence. But knowing the physics does not diminish the feeling of standing in amber light watching shadows grow. It gives us control over that feeling. Mastering natural light is, finally, about becoming fluent in a language the sun has been speaking all along. We just need to show up early enough to listen.
Frequently Asked Questions
Q: What is golden hour in photography?
A: Golden hour is the period shortly after sunrise and shortly before sunset when sunlight is warmer, softer, and more directional due to travelling through a greater thickness of atmosphere. It produces flattering, wrap-around light ideal for portraits, landscapes, and street photography.
Q: How do we calculate golden hour for our location?
A: Use apps like PhotoPills or The Photographer’s Ephemeris, which calculate exact sunrise and sunset times and sun position angles based on your geographic coordinates and the date you are shooting.
Q: What camera settings work best during golden hour?
A: Shoot in RAW, set white balance manually to 5,500-6,000K, use a wide aperture (f/1.8-f/2.8) for portraits or f/8-f/11 for street and landscape, and expose for the highlights to protect against blown-out skies. Recover shadow detail in post-processing.
Q: What is the difference between golden hour and blue hour?
A: Golden hour occurs just after sunrise and before sunset, producing warm amber light. Blue hour occurs just before sunrise and after sunset, when the sun is below the horizon but the sky glows a deep, even cobalt – ideal for architectural and cityscape photography where balanced artificial and natural light is needed.
Q: What is time blending in photography?
A: Time blending is an advanced compositing technique where photographs taken across golden hour through to blue hour are merged into a single image using luminosity masks, combining the warmth of dusk with the cool drama of twilight in one composite frame.
Source: calendar://evt-gen-evt-intl-day-of-light-001
This article was researched and written with AI assistance, then reviewed for accuracy and quality. Talulah Menser uses AI tools to help produce content faster while maintaining editorial standards.