Last updated: May 12, 2026
Using article:write to polish and expand the provided draft per reviewer feedback – shifting to we-voice, adding a concrete shooting sequence, weaving in art references, and ending on the image rather than FAQ.
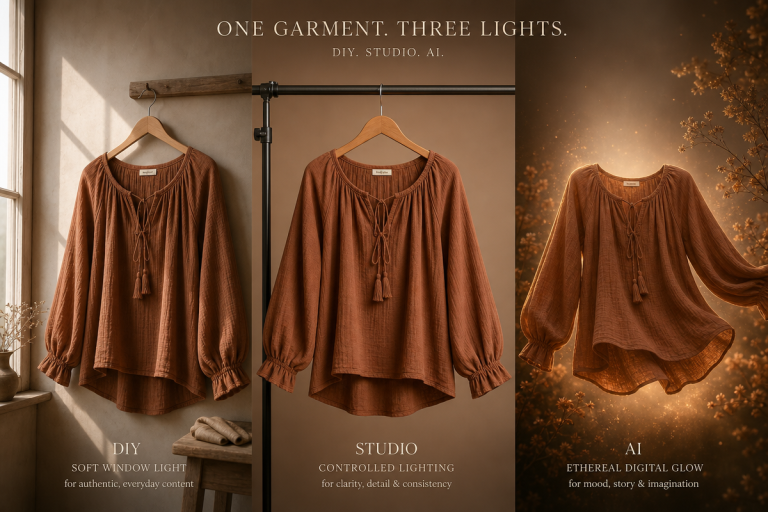
Image: Robert Silver Photography
A face cut in two by a window frame. One eye lit, one swallowed by shadow. The subject glances slightly off-camera, jaw set, expression unreadable. No colour. No distraction. Just light carving a human being out of darkness.
That image is entirely achievable – with a smartphone, a window, and a working understanding of what black and white portrait photography actually demands of us.
Here is the thing most tutorials skip: removing colour from a photograph does not make it dramatic. It makes it honest. Every weakness in light, composition, and emotional connection is exposed. The format rewards photographers who have trained their eye to see in contrast – not in hues.
Why Black and White Portrait Photography Demands a Different Kind of Seeing
Image: Robert Silver Photography
The answer is structural. When colour disappears, the image stands on four remaining pillars: light, shadow, composition, and emotion. If any one of those is weak, the photograph feels flat – regardless of what camera we used.
Think of it like sculpture. A colour image is a painted surface – colour can seduce the eye, distract from flaws, create energy out of thin air. A black and white image is unpolished marble. The form has to hold up on its own.
This is not a new problem. Renaissance painters solved it first. Caravaggio and Rembrandt perfected chiaroscuro – the Italian word for light-dark – as a way of pulling subjects out of an almost black background, as if illuminated from within. Film noir borrowed the technique wholesale in the 1940s: faces half-lit, shadows pooled on floors, moral ambiguity made visible through the contrast between the lit world and the dark one. When Irving Penn stripped his subjects down to a plain studio corner and a single light source, he was following the same logic – elimination as a form of power. When Richard Avedon pressed subjects against a white backdrop, he removed every escape route from the face.
Photographer Robert Silver demonstrated this clearly by shooting an entire editorial portrait series with nothing but natural light, a Nikon Z8, and two prime lenses – a Viltrox AF 16mm f/1.8 and a Nikon Nikkor 50mm f/1.2. No strobes. No reflectors. No artificial fill. The discipline was not a limitation; it was the point. Minimal gear forces concentration on what actually matters: where the light is falling, where our subject is placed, and whether we have given them room to express something real.
How to Find and Use Natural Light for Dramatic Contrast
Natural light is the engine. The direction it falls from, and how hard the transition is between lit and shadowed areas, determines whether our portrait has depth or looks like a passport photo.
Two sources work exceptionally well for black and white work.
Window light – Soft, directional, controllable. We position our subject at roughly 45 degrees to a large window and get a clean transition from highlight to shadow across the face. The larger the window, the softer the edge. The smaller the window – or the further our subject stands from it – the harder and more dramatic the contrast becomes.
Harsh outdoor sunlight – Counterintuitive for portraiture, but powerful in monochrome. Midday sun overhead creates strong under-eye shadow and brow-line contrast. Low-angle golden-hour light rakes across the face and reveals texture. Both produce the bold tonal separation that makes black and white images feel urgent and alive.
We train ourselves to read these scenes before lifting the camera. Walk into a room and notice where the highlights are brightest, where the shadows fall deepest, and where the edge between them is sharpest. That edge – the transition zone – is where the image lives.
The Shot Recipe: A Practical Shooting Sequence
Here is the sequence we return to again and again, whether shooting on a phone or a full-frame camera.
Step 1: Place the subject. Position them so the window is at 45 degrees to their face, neither front-on (which flattens) nor side-on (which may block the eye entirely). Ask them to angle their body slightly away from the light source and turn their face back toward it. This creates a natural shoulder line and brings the near eye into the light.
Step 2: Find your position. Stand at the subject’s eye level or fractionally below. This reads as respectful, intimate, authoritative – the visual language Penn used in his editorial work. Step back enough that we are working the lens’s flattering focal range; too close on a wide lens and the nose distorts.
Step 3: Set exposure for the lit side of the face. We expose for the highlights on skin – not the midtones, not the shadows. Letting the shadow side go fully dark is a deliberate creative choice, not a mistake.
- On a phone: Tap the lit area of the face to lock exposure and focus. Swipe down on iPhone (or use the sun slider on Android) to slightly underexpose. Portrait mode off – we want control, not computational guessing.
- On a mirrorless or DSLR: Use aperture priority. Set the aperture between f/1.4 and f/2 to separate the subject from the background. ISO 100-400 in good window light. Use exposure compensation at -1/3 to -2/3 to protect the highlights. In direct outdoor sun, we may push to f/4-5.6 and use spot metering on the face.
Step 4: Direct the subject with precision. Ask for a chin drop of about five degrees. Ask them to find a point off-camera and just past your shoulder. Ask them to think about something specific. Real thought reads; performed emotion rarely does.
Step 5: Shoot a sequence. Bracket slightly in exposure. Move a half-step left and right between bursts. The difference between the definitive frame and the near-miss is often a matter of centimetres and milliseconds.
Lens Choice and Composition
Two lenses, two entirely different statements. A 16mm wide angle pulls the environment into the frame, adding context and bold editorial perspective – useful when the setting carries meaning. A 50mm standard lens compresses the subject slightly, feels natural to the eye, and produces the kind of intimate, emotionally close portrait that draws the viewer directly into the face.
Composition in black and white portraiture follows the same rules as any serious visual craft, but the absence of colour sharpens their impact. A few principles worth building into habits:
- Leading lines – Steps, doorframes, shadows cast on walls – any strong line that pulls the eye toward the subject.
- Natural framing – Shoot through a doorway, a gap between buildings, or behind a foreground element. The frame-within-a-frame focuses attention and adds depth.
- Negative space – Leave deliberate empty space around the subject. It creates editorial quietness. The image breathes.
- Angle as language – Shooting low gives the subject authority. Shooting high creates vulnerability. A slight tilt introduces energy and unease. Each choice changes what the image says.
Building a Consistent Editing Approach
The photograph is made in-camera. Editing refines it.
We work in a consistent sequence. Before converting to monochrome, we adjust the colour channels to shape how tones will read. Warming the skin using the orange and red sliders in the HSL panel brightens the face – critical in monochrome, where skin can otherwise go flat and grey. Cooling the background blues pushes any sky or wall toward near-black, which separates the subject cleanly without the need for artificial vignetting. If clothing is competing with the face, we darken its colour channel before the conversion.
Once in monochrome, we work the tone curve to extend contrast without crushing detail in the shadows. Bring the whites up just short of clipping. Lift the blacks slightly if we want a filmic, matte feel; push them toward pure black for high-contrast editorial severity. On skin, we use targeted local adjustments – a brush or radial gradient over the face – to recover midtone detail if the contrast has hardened the expression.
For a darker, more noir character, we apply a slight S-curve and pull the shadows toward cool with a colour grade. For a cleaner Penn-style image, we keep the tone flat, almost clinical, and let the composition carry the weight.
Develop a signature look and apply it across a series. Consistency is what separates a collection of photographs from a body of work.
Lightroom and Capture One both offer strong monochrome conversion tools. If we are building more complex creative workflows – particularly for batch processing or integrating AI-assisted tools – How to Build, Run, and Scale High-Quality Creator Workflows in ComfyUI is worth reading alongside our photography practice. The same principles of systematising a creative process apply across disciplines.
The image we described at the start – one eye lit, one swallowed by shadow, jaw set, expression unreadable – is not the product of expensive equipment or a dedicated studio. It is the product of a window, a person placed at 45 degrees to the light, an exposure locked on the bright side of the face, and a decision to strip everything unnecessary away. Caravaggio reached for it in oil paint. Penn reached for it with a light stand and a plain corner. We can reach for it with whatever is in our hands right now.
Light, shadow, form, and a person telling the truth in front of the lens. That is enough.
Source: https://www.robertsilverphotography.com/photography-blog/how-to-take-better-black-white-portraits
This article was researched and written with AI assistance, then reviewed for accuracy and quality. Talulah Menser uses AI tools to help produce content faster while maintaining editorial standards.