Last updated: May 15, 2026
Picture this: a brick wall at noon, bleached flat by overhead sun, every detail vanished into uniform grey. Now picture the same wall at 5pm, the low light raking across the surface at an angle – every groove, chip, and imperfection throwing its own small shadow. Same wall. Same camera. Completely different photograph. The only variable is light.
This is the insight that separates photographers who advance quickly from those who plateau: understanding light direction and its quality is more valuable than any lens upgrade. UNESCO recognised as much when it established International Day of Light, observed annually on 16 May – a date that celebrates light’s role in science, culture, and visual art. As that date approaches, we want to give you the practical toolkit to read, chase, and control light in any situation.
What you’ll need before we start

Image: Skylum
You do not need a professional camera. A smartphone with a manual or pro mode works. What you do need:
- A subject you can return to repeatedly (a window ledge, a houseplant, a willing friend)
- A notepad to log your observations
- Time across different parts of the day
- Optionally: a reflector (white card works), a softbox, or a ring light for indoor sessions
The skill here is perception, not equipment.
Understanding light direction: the foundational principle
Light direction is one of two fundamental qualities every photographer must learn to read. Direction determines where shadows fall, and shadows determine shape. Front lighting – where the source sits behind the camera, aimed at the subject – flattens everything. Shadows disappear. Texture disappears. Depth disappears. It is the look of a passport photo.
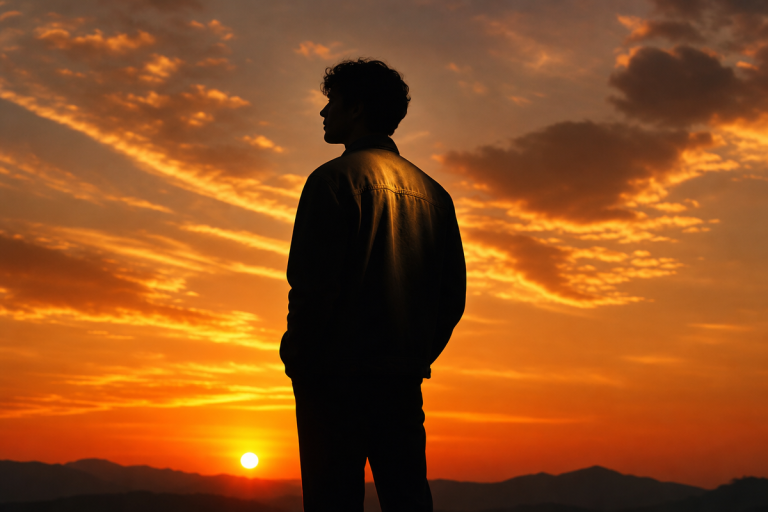
Move the light 90 degrees to the side and everything changes. Side lighting reveals texture, carves dimension into faces, and makes fabric look tactile. Back lighting creates silhouettes, rim effects, and a sense of separation from the background. Think of a figure walking into a sunset – all rim light and atmosphere.
Start your practice with a single subject and a single window. Move around it. Watch what happens to the shadows as your position changes. That one exercise teaches more than hours of theory.
How to read light quality: hard versus soft
Hard light comes from a small, concentrated source – a clear midday sun, a bare flash, a torch. It produces sharp-edged shadows and high contrast. Think of film noir cinematography, or the sidelit portraits of Irving Penn. Hard light is dramatic. It can be punishing on skin but extraordinary for architecture, texture, and graphic compositions.
Soft light comes from large, diffused sources – an overcast sky, a north-facing window, a flash bounced off a ceiling. It wraps around the subject, reducing harsh shadows and flattering skin. Most commercial portrait work uses soft light as its foundation.
Neither quality is superior. They serve different purposes. The craft is in knowing which to reach for.
A brief historical aside: the Impressionists understood this distinction long before photography formalised it. Monet painted the same haystack across different times of day, documenting how light quality shifted mood – soft, diffused morning light versus the hard, golden directional light of afternoon. Photographers who practise on the same subject across changing conditions are doing exactly what Monet did: building a vocabulary of light.
Step 1: Chase the golden hour
The golden hour – shortly after sunrise and before sunset – is the easiest place to experience exceptional light. The sun sits low on the horizon, so light arrives at a flattering angle (direction) and the atmosphere scatters and warms it (quality). Both qualities work together almost automatically.
Set your aperture to f/5.6-f/8 for portraits during golden hour. Wide enough to let in light, narrow enough to keep your subject sharp. For landscapes where front-to-back sharpness matters, push to f/8-f/11. Let your camera or phone handle the shutter speed while you focus on positioning.
Walk around your subject. Notice how the light looks when it rakes across from the side versus when it comes over your shoulder. Photograph both. Compare.
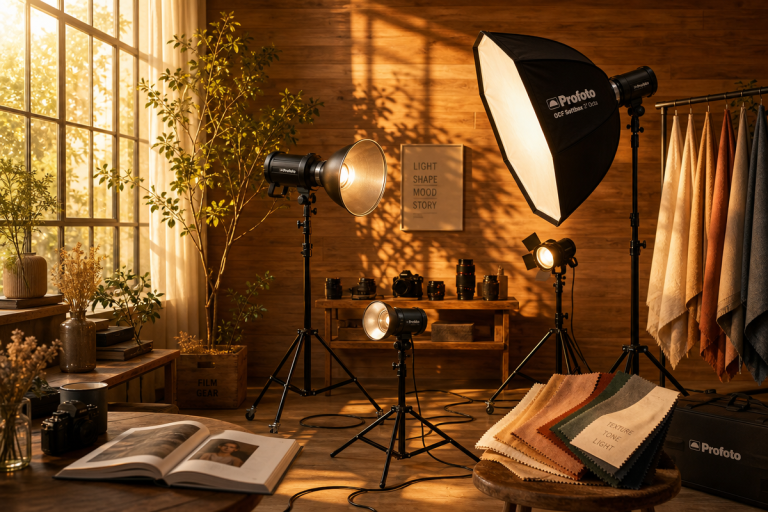
Step 2: Learn the three-point lighting setup
Three-point lighting – key light, fill light, back light – is the foundational studio arrangement. The key light is your main source, positioned 45 degrees to the side and slightly above the subject. The fill light sits on the opposite side, softening the shadows the key creates. The back light separates the subject from the background.
This setup gives you precise control over direction, quality, and mood. For portraits, this is where skills practised outdoors translate to a controlled indoor environment. Our guide on how to improve your portraits: posing, lighting & composition walks through how to adapt this for different portrait styles.
You do not need studio equipment to practise. A window as key light, a white card as fill, and a desk lamp as back light teaches the same principles at zero cost.
Step 3: Use aperture to manage light
Aperture directly controls how much light reaches the sensor. Wide apertures – f/1.8 to f/2.8 – suit close subjects and create shallow depth of field where backgrounds blur away. They work well in low light but demand precise focus.
For product work where every element must be sharp across the frame, f/8 or tighter is standard. Our piece on flat lay photography setups covers this in detail for e-commerce and product contexts.
Match your aperture to what you need to be sharp, then adjust your other variables accordingly.
Step 4: Sculpt with shadow deliberately
Dynamic lighting – the deliberate manipulation of light and shadow – transforms ordinary scenes. The technique is as old as Caravaggio’s chiaroscuro: use shadow not as an absence of light but as a compositional element in itself.
Try this. Set up a portrait with a hard light source positioned to one side. Now block part of that light with your hand or a piece of card. Watch the shadow edge move across your subject’s face. You are sculpting with light now. The best portrait photographers do not accept the light in a room – they shape it.
For photographers curious about where this craft is heading, AI trends for photographers in 2026 covers how tools like AI lighting simulation are starting to complement these foundational skills.
Troubleshooting common light problems
Flat, lifeless portraits even in good light.
Your light source is probably too frontal. Move it 45 degrees off-axis. Even a small shift creates shadow relief and visible dimension.
Harsh shadows under eyes and nose in outdoor shots.
This is overhead light – midday sun at work. Shoot in open shade (under a tree, beside a building) where the sky becomes a large, soft fill. Or hold a reflector below the face to bounce light upward.
Subject too dark against a bright background.
Expose for the subject, not the background. On a phone, tap the subject’s face to set exposure there. On a camera, use exposure compensation (+1 to +2 stops) or add fill flash.
Where to go next
Return to the same subject across different times of day and different weather. Morning fog. Noon sun. Golden hour. An overcast afternoon. Log what you observe. Build your visual vocabulary.
International Day of Light on 16 May is a useful annual reminder that light is not a technical consideration – it is the medium itself. Every photographer from Henri Cartier-Bresson to Annie Leibovitz built their reputation on reading light faster and more fluently than those around them. The gear followed the vision, never the other way around.
Invest your next hour in observation, not equipment research. That is where the work begins.
Frequently Asked Questions
Q: What is the difference between hard light and soft light in photography?
A: Hard light comes from a small, concentrated source and creates sharp-edged shadows with high contrast. Soft light comes from large, diffused sources – like an overcast sky or a softbox – and wraps evenly around the subject, reducing harsh shadows and flattering skin.
Q: When is the best time of day to photograph outdoors?
A: The golden hour – shortly after sunrise and before sunset – produces warm, directional, naturally diffused light widely considered the most flattering for photography. Midday sun creates harsh overhead lighting that flattens subjects and casts unflattering shadows beneath eyes and noses.
Q: Does learning to read light really matter more than buying better gear?
A: Yes. Photographers who develop the ability to read and control light improve faster than those who invest in more expensive equipment. The same camera in different lighting conditions produces dramatically different results – and a skilled photographer with a phone can outperform an inattentive one with a professional DSLR.
Q: What is three-point lighting?
A: Three-point lighting is a foundational setup using a key light (the main source), a fill light (to soften shadows), and a back light (to separate the subject from the background). It gives photographers precise control over light direction, quality, and the mood of a portrait.
Q: What aperture should I use for portraits versus landscapes?
A: For portraits, wide apertures of f/1.8-f/2.8 suit close subjects and work well in lower light. For landscapes where front-to-back sharpness is required, f/8-f/11 is the standard range.
Source: calendar://evt-gen-evt-intl-day-of-light-bu-001
This article was researched and written with AI assistance, then reviewed for accuracy and quality. Talulah Menser uses AI tools to help produce content faster while maintaining editorial standards.