Last updated: May 19, 2026

Image: Comfy Org
Warm amber rakes across a face from the left. The far cheek dissolves into shadow. A thin ring of specular highlight traces the jawline. The grain is thick and organic – something between Kodak Portra and a Saul Leiter transparency held up to the light. The background has collapsed into a soft terracotta wash, out of focus and luminous, holding the subject in place the way a Rembrandt canvas holds its sitter. This is the image we are going to build.
Not by fumbling through presets or layering a fixed filter over a base result, but by assembling the exact conditions that produce it – light direction, grain character, colour temperature, tonal balance – as a reusable, adjustable, fully transparent visual pipeline. That pipeline is a ComfyUI AI image workflow, and once you have built one for a specific look, you will understand generative image-making in a way that dropdown menus and sliders cannot teach.
What ComfyUI Is – and Why It Thinks Like a Photographer
Image: Comfy Org
ComfyUI is a free, open-source interface for AI image generation built around a node canvas: a diagram where every processing step – loading a model, encoding a prompt, sampling a latent image, decoding it back into pixels – exists as a discrete object you can see, adjust, and rewire. Nothing is hidden inside a black box. The full logic of an image lives on screen.
Photographers will recognise the underlying idea instinctively. Think of it as a signal chain – a camera body feeding a prime lens feeding a colour grading stage – or as an analogue darkroom where each chemical bath is a distinct, controllable stage. Ansel Adams described the negative as a score and the print as the performance. In ComfyUI, the node graph is both: a written score you can perform as many times, and in as many interpretations, as you need.
The software runs locally on any machine with a reasonably capable NVIDIA GPU (8GB VRAM is a comfortable minimum). It also runs in the browser via Comfy Cloud if you would rather work without local hardware. Both routes are free at the core. Local installation takes about ten minutes: clone the official repository, run pip install -r requirements.txt, launch with python main.py, and open localhost:8188. A default workflow appears on first load, already wired and ready to run.
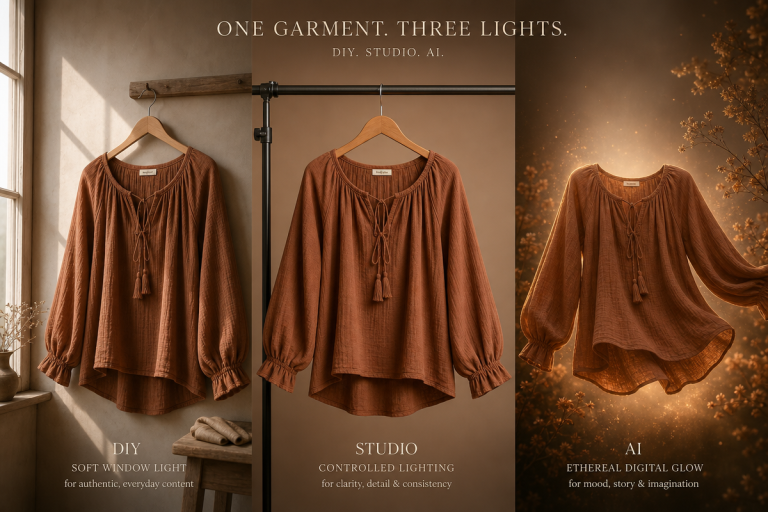
Portrait Workflow: Warmth, Shadow, and Organic Grain
Let us return to that opening image. The aesthetic sits somewhere between Alec Soth’s intimate colour portraits and the pushed-film grain of 1970s editorial photography. Warm highlights, shadow that deepens toward the edges, and a texture that makes digital capture feel like it has lived in an emulsion.
Capturing your source image. Before we touch the node canvas, we need a strong starting frame. Place your subject at roughly 45 degrees to a large north-facing window – indirect daylight, diffused by cloud or net curtain, reads as the softest studio light available. Camera at eye level, lens at an 85mm equivalent, aperture at f/1.8 or f/2. This focal length compresses the background and separates the subject in the way the look demands. On a phone, enable ProRAW (iPhone 12 Pro or later) or RAW capture on a Pixel device to preserve full tonal range. Export a clean, flat JPEG or TIFF. We will add the atmosphere in the graph, not in camera.
Building the node graph. Open ComfyUI and double-click the canvas to search for nodes. Start by placing these in sequence:
- CheckpointLoaderSimple – for portrait work, a fine-tuned checkpoint such as Realistic Vision or Dreamshaper gives more natural skin rendering than a general base model.
- CLIP Text Encode (positive) – describe the lighting conditions and film stock, not the subject alone. Try: “warm amber side-lighting, deep shadow, cinematic portrait, Kodak Portra grain, analogue film photography.”
- CLIP Text Encode (negative) – actively exclude what breaks the mood: “harsh flash, digital noise, smooth skin, oversaturated, HDR.”
- KSampler – set steps between 25 and 35, CFG scale at 7. The choice of sampler matters here: Euler Ancestral preserves fine textural variance; DPM++ 2M Karras produces a smoother, more painterly result closer to medium-format film.
- VAE Decode then Preview Image to close the chain.
The first generation will be rough and imperfect. That is the correct outcome at this stage. We are learning how visual data moves across the graph, not producing a finished piece.
Shaping mood and texture. To push the warm-to-cool contrast seen in the opening description, add an ImageFilter node after the VAE Decode and dial in film grain as a separate, controllable layer. This keeps the grain adjustable without regenerating the entire image – the equivalent of dodging and burning after the enlarger exposure is made. To split global mood from subject detail in the prompt, use a CLIPTextEncodeSDXL node that accepts two input fields independently. Set the global condition to “warm, intimate, filmic” and the subject condition to “sharp eyes, natural expression, soft cheekbones.” Adjust the guidance weights for each independently. This mirrors how a portrait photographer thinks: the lighting is a decision about atmosphere; the subject’s expression is a decision about the person.
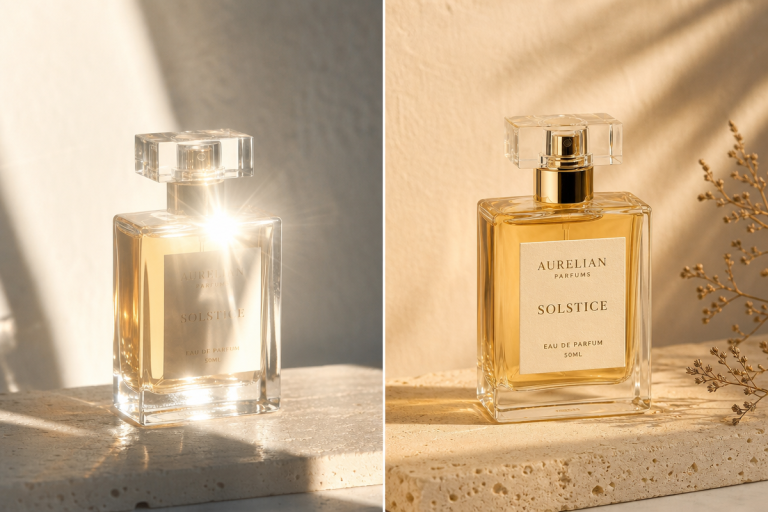
Product Photography Workflow: Studio White and Lifestyle Context
Irving Penn built an entire visual language around the controlled still life – objects isolated on seamless paper, every shadow deliberate, negative space used as actively as the subject itself. His approach translates directly into a product workflow, with one advantage he never had: we can test two entirely different background treatments from the same source image simultaneously.
Capturing the product. Phone photography is entirely valid here. Place your product on a white or neutral surface near a window providing indirect daylight. Shoot from directly above for flat lays, or at a 30 to 40 degree angle for depth. Even lighting with controlled shadow is the goal – we will introduce contrast and character in the graph. If highlights are blowing out on your phone, tap-to-expose on the brightest area before capture.
The two-branch workflow. In ComfyUI, right-click any node to duplicate it. Pull a wire from the KSampler’s LATENT output and route it into two separate VAE Decode nodes, each connected to its own prompt chain. One branch describes a clean studio aesthetic: “product photography, seamless white background, soft diffused light, commercial photography.” The second describes a lifestyle context: “coffee table, natural wood surface, morning window light, editorial still life.”
Both branches run from the same image input and seed. We compare outputs side by side before committing to either direction. No decision has been made, no history exhausted – every path remains open until we choose.
Cinematic Still-Life Workflow: Light as the Subject
Picture this: a half-empty glass on a windowsill, amber light entering from stage left, the room beyond in deep blue shadow. It is an Edward Hopper composition, or a frame borrowed from a Tarkovsky film – that quality of light not as illumination of objects but as the subject in its own right, a mood before a scene.
For this aesthetic, the prompt does heavy lifting on atmosphere rather than description: “cinematic still life, window light, warm amber and cool blue contrast, long shadows, analogue photography, grain, quiet, domestic.” The negative prompt should push back on anything synthetic or commercial: “digital, HDR, oversaturated, product shot, clean.”
The workflow is the same node structure as the portrait above. The difference is in what we are asking the model to attend to. After the preview, connect an Image Upscale node to examine the additional textural detail a higher-resolution pass reveals – cinematic stills reward closely inspected grain. On machines with limited VRAM, add --lowvram to the ComfyUI launch command or run the upscale pass via Comfy Cloud to offload computation entirely.
Editing pairings. ComfyUI handles generation; the finishing work often benefits from a dedicated editor alongside it. A base Lightroom or Capture One grade before feeding an image into the workflow – pulling shadows, reducing digital sharpness, adding a slight warm-cool split tone – gives the model a more sympathetic input to work from. After generation, a light Lightroom pass for final contrast and output sharpening rounds the result into something ready for use.
Sharing Workflows and Reproducing Results
Every image exported by ComfyUI carries the complete node graph embedded in its file metadata. Drag that image back into ComfyUI – on any machine – and the full workflow reconstructs itself: every parameter, every connection, every model reference. A portrait treatment refined over an afternoon can be shared as a single JPEG file. The node graph travels with the image.
For photographers working with editors or art directors, this changes how creative development can be communicated. Rather than describing a look in words or attaching a reference image with no production context, we send the working diagram directly.
Troubleshooting: Three Common Blocks
Generation fails immediately. The model file is misnamed or placed in the wrong directory. Check models/checkpoints/ and confirm the filename in your CheckpointLoaderSimple node matches exactly – capitalisation and extension (.safetensors or .ckpt) both matter.
Connections exist but nothing generates. A wire shown in red or grey indicates a data type mismatch between two connected nodes. Delete the wire, confirm the output and input types align, and reconnect. One mismatched connection silently blocks the entire pipeline.
Out-of-memory errors mid-generation. Reduce resolution or batch size on the KSampler first. Add --lowvram to the terminal command used to launch ComfyUI. Alternatively, move the workflow to Comfy Cloud to offload the computation.
We began with a description of an image: warm amber, deep shadow, Portra grain, a face pulled from light and set against a terracotta wash. We built the exact conditions that produce it – a diagram of creative intention in which every decision is visible, every path remains open. The node canvas does not replace the eye behind the camera. It gives that eye a new kind of darkroom to work in.
Frequently Asked Questions
Q: What is a ComfyUI AI image workflow and how is it different from other AI tools?
A: A ComfyUI AI image workflow is a visual, node-based pipeline where every step of the image generation process – model loading, prompting, sampling, decoding – lives as an individual, addressable node on a canvas. Unlike linear tools with fixed menus, we can branch, adjust, and revisit any parameter at any point without destructive changes.
Q: Do I need a powerful GPU to run ComfyUI?
A: A dedicated GPU with 8GB VRAM is a comfortable starting point for local use. If you are working from a laptop or without compatible hardware, Comfy Cloud runs the same ComfyUI workflows on cloud infrastructure with no local GPU required.
Q: Is ComfyUI free to use?
A: Yes. ComfyUI is free and open source with no subscription fees or hidden costs. The optional Comfy Cloud service has its own pricing for cloud compute resources.
Q: Can I share ComfyUI workflows with other people?
A: Exported images from ComfyUI carry the complete workflow embedded in their metadata. Another user can drag that file into their own ComfyUI instance to reconstruct the exact node graph – including all parameters and settings – that produced it.
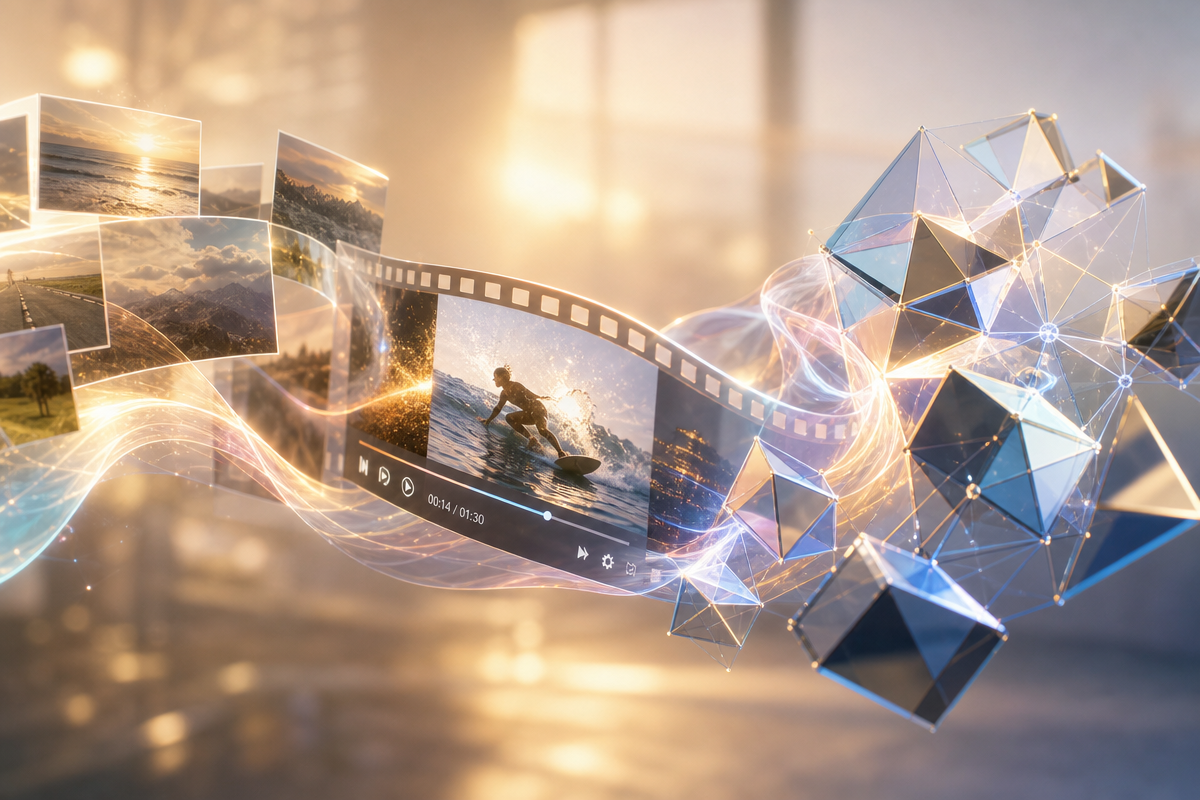
Q: What kinds of media can ComfyUI generate?
A: ComfyUI supports image, video, and 3D generation from the same node-based canvas, with an active ecosystem of community-built node extensions continually expanding its capabilities.
Source: https://www.comfyai.org/
This article was researched and written with AI assistance, then reviewed for accuracy and quality. Talulah Menser uses AI tools to help produce content faster while maintaining editorial standards.